How to Grow Peanuts

Peanuts are one of the easiest things to grow in the garden. You can use peanuts in so many ways; steam them, roast them, sun dry them, or even cook delicious meals with them. You can even make your own peanut spreads if you want. Since peanuts have so many uses, many homeowners are fond of growing them in their own lawns.

If you are planning to grow peanuts as well, here are the things that you have to remember:How to Grow Peanuts

Get Your Peanuts

It is actually easy to grow peanuts because all it takes is a bag of fresh and raw peanuts that you can easily buy from the grocery store. If you are really that meticulous and you want to make sure that your peanuts were not treated with any kind of chemically formulated pesticides, you can always go to your trusted local farmer’s market.

Preparing The Soil

Make sure that your soil is made of sandy oil. It should also be well draining. You must have at least 7 inches of soil to make sure that your peanuts will have a lot of room under the ground to grow its roots. Plant the peanuts one by one, making sure that there is an ample space in between them, so they can grow freely.

You can also add mulch if you want. You can also mix your sandy oil soil with compost or manure in order to add nourishment to your peanut plant.

By the way, when planting peanuts, you have to plant whole kernels. If they split, they will not be able to grow and produce sprouts. Water your peanuts once. Wait for it until the first sprout shows on top of the soil. This should happen in just a week’s time.

Nurturing Your Peanuts

As a rule of thumb, always remove weeds from the ground. This is because you want to remove anything that can share the soil’s nutrition. Watering regularly is also needed, but make sure that you do not overdo it, otherwise, they will die. You should also make sure that your peanuts will have enough sunshine but not to the extent of letting them sit under the sun for too long, because overexposure under the sun can damage your peanut plants.

Harvesting Peanuts

Harvesting peanuts can happen after 130 days. After 130 days, you can already expect peanuts to be fully matured. You can slowly pull them off the ground, and let them dry. Make sure that you store your peanuts in a clean and dry place to preserve its freshness. If you are worried about their shelf life, you can always roast them and store them in an air tight container that can be perfect for weeks of healthy snacks, or you can also turn them into peanut spreads that is perfect for gift giving this coming holidays.

These are the different steps that you have to do, if you want to grow healthy and bountiful peanuts that will give you a bountiful harvest.

image courtesy of tamburix

How to Grow Orchids Indoors

Orchids are very well known exotic flowers. They normally grow in the wild, which makes them very difficult to grow commercially, and even more challenging to grow indoors, as they are accustomed to growing in an outdoor setting.

Nonetheless, growing orchids indoors is not an impossible thing to do, especially these days, when there are several things thatHow to Grow Orchids Indoors can help us achieve the results that we want to achieve.
For instance, there are potting mediums that we can use for orchids, as well as hybrids that will make orchid growing easy, especially for beginners.

If you want to know how to grow orchids indoors, here are the steps that you need to follow:

Purchasing Orchid Seedlings

The best way to start growing orchids is through seedlings. You can buy orchid seedlings almost anywhere. But if you want the best assistance for this, it might be best to go directly to a nursery, so that the staff there will be able to assist you when you have questions. Get your seedlings from nurseries, but make sure that your seedlings will not show signs of health issues. Usually, orchids with disease have black patches that can be seen on its leaves. Ideally, you would like to get orchid seedlings with bright green leaves.

The Orchid Environment

Choosing your orchid environment can be quite challenging. This is because you want to mimic the same environment is has, when it was growing in the wild. But for orchids that you want to grow indoors, you might want to select the ones that are called “air plants”. These are the types of orchids that grows on trees, where they receive an ample amount of shading from the branches and leaves of the trees, when there is too much heat coming from the sun. Trees are also often packed with fungus and debris. These are actually nutrients for the air plants. So if you want to grow orchids indoors, try to emulate this type of environment for it to grow and produce beautiful exotic blooms.

Lighting is also needed by your orchids. You can either install a filtered light, or you can also place them in front of window that gets enough sunshine. However, since orchids do not want too much sunshine, you need to place a sheer curtain or covering to prevent them from getting too much heat.

You must also invest on a good air humidifier. Orchids love humidity, so this is very important if you want them to grow perfectly indoors.

Do not over water your orchids. It will just drown them and kill its roots. Just make sure to water them when you feel that the soil is already dry.

Adding fertilizer to your orchids will help your orchids grow healthy with a lot of vigor. Remember, making sure that your orchids are healthy will also give you the same level of assurance that your orchids will be able to produce healthy and vibrant flowers that you will surely be proud of.

image courtesy of infomastern

How to Grow Onions

Onions are very tasty and make so many dishes savory. It can be used in a wide variety of dishes from appetizers, soups, and of course in main courses. Growing your own onions is a nice idea, because not only do they grow easily, they also need very little space in your garden, which is good for people who want to start a small vegetable garden at home.

One more thing that you will like about onions is that they grow fast and it has a long shelf life. Meaning, you can harvest a largeHow to Grow Onions batch during the spring time when onions are best planted, and store them up to make a delicious onion soup that is perfect during the winter.
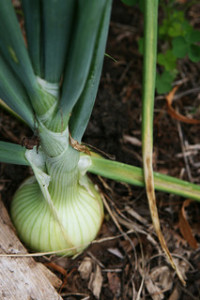
So if you want to grow onions, here are the ways to do it:

Choose Your Onions

Onions do come in different varieties that are often categorized by color (yellow, white, and red), and of course by growing type (long day & short day). Long day onions start to sprout early when the day is longer (about 14 to 16 hrs / day) and short day onions grow when the day is shorter (about 10 to 12 hrs / day).

Onion Seeds Or Bulbs?

You can plant onions by either planting seeds or bulbs. If you have no experience yet, professional vegetable gardeners prefer that you choose bulbs over seeds. This is because onion bulbs are easier to grow since they have the ability to withstand most distractions during the growing season. But if you prefer growing your onions from seeds, you may still do so.

Plant Them Indoors First

Unless you live in an area that constant has below 20 degrees F in temperature, you must plant your onions indoors, so that you can manage the temperature easily. The best time of the year for you to plant onions is during the spring time when the frost is out, and the sun is up. Onions can die during the cold weather, that is why.

Taking Them Out

When your onions are ready to be planted outside, make sure to plant them in an area where there is direct sunlight. Onions love the sun, and this will make them grow healthier and more flavor. Furthermore, you must give them enough space to grow. If you want bigger onions, you have to plant them far apart.

Nurturing The Onions

Make sure that the soil is properly nourished and free from any weeds. However, always remember that onions have very fragile roots. So be extra careful when weeding your patch, to make sure that you are not damaging the roots of your onions.

Harvest Onions

You should know when the onions are already ready for the harvest when the top is already golden in color. Pull the onion by grabbing the sprout, and gently lift it with one hand.

Onions have a good shelf life, so all you need is dry them, clean them, and place them in a dry place to keep them fresh.

image courtesy of quinn.anya/flickr

How to Grow Mushrooms

Mushrooms are delicious, nutritious, and make a wonderful dish all the time. Growing mushrooms is actually very easy. In fact, growing your own mushrooms will also give you the peace of mind of eating it with pleasure, minus the worry that you might be eating something that can make you sick.

Furthermore, weight watchers and the health conscious people should really learn how to grow their own mushrooms. BecauseHow to Grow Mushrooms aside from its health benefits, mushrooms are also great for people who want to lose weight, since mushrooms are very low in fat and calories.
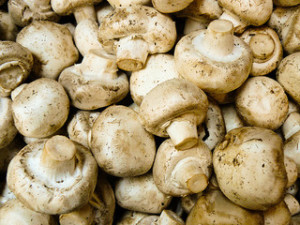
Mushrooms love the indoors. This is another advantage if you hate going under the sun to grow your own food. So if you have a closed yet well ventilated and easy to manage space at home, you can use it to grow mushrooms.

Here are some tips to remember when growing mushrooms:

Choosing The Type Of Mushroom To Grow

There are several mushrooms that are popular in dishes these days. They are the shitake mushrooms, the button once, and the oyster mushrooms. They are all very easy to grow, but you have to give them the right place where they can grow conveniently. Ideally, all can grow on straw or even in sawdust. But to give them the proper environment where they can get proper nourishment, make sure to follow the list below:

Oyster mushrooms = straw

Shitake mushrooms = sawdust

Button mushrooms = manure with compost

So these are the proper, or shall I say ideal growing places for mushrooms that you might want to consider, depending on the type of mushroom that you want to grow.

Spawns

Now that you have a growing media for your mushrooms already, you should now buy your spawns. Spawns are more ideal compared to spores. This is especially true, if you do not have experience in growing mushrooms yet. You can buy spawns online, in a local farmer’s market, or even at a gardening supply store.

Preparing The Growing Media

Before placing your spawns on your growing media, you have to sterilize it first, in order to kill any microorganism that might interfere or contaminate your spawns. You can do this by heating the media inside a microwave oven for at least two minutes. You might want to damp the media with a little water too.

Heat Will Promote Growth

You might want to heat a pan up to at least 21 degrees C. Place the growing media on top of that, and spread the spawns on the growing media. Leave the pan with the spawns and growing media on top, and place in a room that is dark. This kind of environment is ideal for mushrooms to grow quickly and abundantly. This process will take 3 weeks. After that, you will have to transfer it in a room where the temperature is colder (at least 13 degrees C).

Harvest Time

Wait about 3 weeks again, and after that, you will already see mushrooms sprouting.

image courtesy of Dawn Endico/flickr

How to Grow Hops

Hops are great to plant at home especially if you are looking forward to brewing your own homemade beer. In case you do not know, some beers are made of hops. You can also make different types of beers from the different variants of hops that you plant. But aside from making beer, people also grow hops because they make nice decorative pieces that hangs over trellises.

Hops normally grow during late spring or up to early summer. Since we are already in our mid-summer, you can still check out How to Grow Hopsthe steps we have below, so you can prepare your hops next spring.
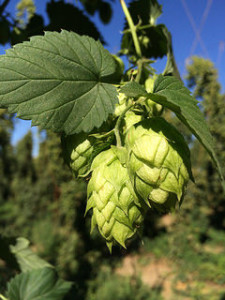
Here are the different steps on how to grow hops:

  1. Preparing the place – since hops are plants that climb, you might want to provide trellises or anything where they can climb on. You should also find the perfect place to plant them where there is equal sun and shade. Then of course, your soil should be well-nourished, and should be well draining.
  2. Planting the rhizomes – hops starts out from rhizomes. They are small root like stems. You can buy rhizomes from farmer’s market or from vegetable garden supply stores, or you can also check independent growers online. Dig holes up to 8 inches deep. Place the rhizomes inside the hole, and cover it with lose soil. Make sure to plant the roots first, and the sprouts point upwards. Make sure that you still have at least an inch of soil at the top.
  3. Watering Hops – hops love water. But make sure that the soil is well draining, because if not, it will hold up the water, and the hops will die. Water them daily with just enough water that will ensure moisture. After 2 to 4 weeks, you should see sprouts already.
  4. Pruning Hops– the hops will grow in length, but ideally, you might just want to grow 3 to 4 strands of it, and the others, you will need to prune. Choose the best strands to grow. Pruning other strands will help the best strands to grow better, since all of the plant’s energy will be conserved to them.
  5. Harvest Hops – You should harvest hops when they are already ripe. you should know when the hops are ready, when they feel a bit oily and sticky to the touch. They should also show green all over, and they should be a bit lighter, compared to the hops that are not yet ripe.

Once you are done with your first harvest, you have to place your hops inside a tight and sealed container. This will prevent the hops to rot. Expect your next harvest in the next day; do not leave your hops in the vine because it can ripen quickly. That’s if you are not planning to use them for brewing beer, and use them for decorations in your garden.

These are the different steps on how to grow hops at home.

image courtesy of epicbeer/flickr

How to Grow Herbs Indoors

Wintertime is fast approaching, which also signifies the time when planting outdoors is not a good idea anymore. If you want to still continue your planting hobby this winter season, and would like to find satisfaction from seeing your plants grow, then start checking out some of the herbs that you want to grow.

Herbs are quite manageable even during the winter season. They are not very hard to handle, and they require very little How to Grow Herbs Indoorsmaintenance. They just need a good well draining soil to grow on, and water to keep their roots nourished. They can also grow in containers that you can place indoors, so you do not have to worry about planting them outside, or on land.
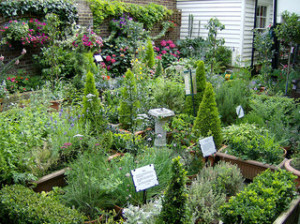
To help you plant and grow herbs indoors, here are the things that you have to do and remember:

  1. Choose Your Herbs – It is always best to go with multiple herbs, as you can use herbs to spruce up the flavor of every dish. You can choose to grow chives, mint, parsley, bay, and so much more! However, you might want to stay away from dill, because this particular herb cannot really grow during the cold weather, regardless of what you do. The nice thing about herbs is that they can be planted in the same pot. So if you have limited space in your kitchen where you intend to place your pots, nor worries! Two to three variants of herbs can share one pot.
  2. Choose Your Pot – Ideally, you would like to use clay pots for herbs, because clay pots can allow moisture in and out. But if you can’t find clay pots, you can always use any type of pot made of plastic or metal. Just make sure to find the ones with holes that will allow easy draining. Just make sure to cover the holes with wire mesh so that the soil will not drain with the water.
  3. Artificial Lighting – if you have a window in your kitchen where there is at least 6 to 8 hours of sunlight, place your pots in that place. If you have none, then you can always use artificial lighting. You can use a full spectrum light for maximum results. This type of light is available in most garden supply stores.
  4. Temperature – make sure that your herbs receive the right temperature. Please see details below:
    • Daytime – 70 degrees F
    • Nighttime – 55 degrees F
  5. Nurturing – make sure that your herbs receive the right amount of water. Ideally, you want to achieve a damp soil, not wet. So watering every 2 days should be good. Remove yellowing leaves too. Leaves that are turning yellow, and still attached to the main trunk will just waste the plant’s energy. You can also add fertilizers if you wish. But if you want to grow organic herbs, you can omit that part.

These are the different steps to take if you want to grow herbs indoors.

image courtesy of larryjh1234/flickr

How to Grow Lettuce

Do you enjoy eating a bowl of fresh greens every day? If so, then growing your own lettuce might appeal you. Keep in mind that although lettuce (of different kinds) are always available in stores, they do not have a long shelf life, even if you place them inside the refrigerator.

So to make sure that you will always have fresh and crisp lettuce in every garden salad that you make, go ahead and learn the How to Grow Lettuceways on how to plant lettuce at home. Believe me; planting and growing lettuce is not as hard as you think!
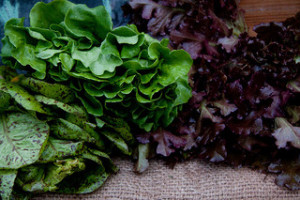
Here is how to grow lettuce at home:

Lettuce Seedlings

If this is your first time to plant lettuce, it is always recommended that you start with lettuce seedlings. It is easier to grow lettuce when roots have been established already. You can buy lettuce seedlings from a local farmer’s market or you can also check who are selling them online. There are many independent lettuce growers around, so you will not have a hard time finding them.

Choose The Planting Area Wisely

Lettuce like it best when the weather is cool and when there is sunshine as well. So it is best to plant them where the sun touches the area. The soil should also have at least a PH of 6. You can work on your soil’s PH easily by just adding mulch or agents that you can buy from garden supply stores. You might also want to plow the soil so that they will be crumbly and you must remove the stones and weeds alongside it. Mix in compost and manure to your soil before planting your lettuce seedlings.

Planting The Lettuce

When planting your lettuce seedlings, make sure that there is at least 8 inches open space in between plants. This will promote proper growth for your plants, because air will circulate better, and the roots under will have enough room to grow.

Nurturing The Lettuce

It is always best to water your lettuce just enough to moisten the soil. However, when watering lettuce, it is best done in the morning, so that the leaves will have enough time to dry. This will prevent bacteria or fungus to build up at night.

Harvesting Lettuce

Harvesting lettuce is easy. All you need to do is cut the leaves when you see that they are already fully grown. If you see that there are some leaves that are just sprouting, avoid cutting them. This will still grow and produce another batch of good harvest.

The nice thing about lettuce is that you can use them in a lot of ways. Aside from making a nice bowl of garden salad that is good for your body and health, you can also use it to make side dishes like coleslaws and use it to make delicious sandwiches that makes a healthy lunch.

These are the different ways to grow your own garden of fresh lettuce at home.

image courtesy of timsackton/flickr

How to Grow Herbs

Growing herbs is both easy and fun. In fact, you can grow multiple varieties of herbs that you can easily reach from your kitchen’s window, to spruce up the flavors of your dishes. Many of us use different types of herbs from thyme, rosemary, dill, parsley, and more. All of these are very easy to grow, and you can grow them in pots too!

The nice thing about herbs is that you do not have to get several different pots of each type of herb. Most herbs can grow How to Grow Herbstogether in one pot bed, making it very easy for you to plant them and reach for them.

Here are the steps you should follow if you would like to grow herbs at home:

The first thing that you have to do is get the herb seedlings. That’s if you do not want to grow them starting from seeds. It is actually easier to grow herbs from seedlings because they have already established roots. So all you have to do now is make sure they live long, add nourishment for vigor, and water them to make sure that you will have constant supply of fresh herbs.

Herbs grow better in terra cotta containers. You can get this type of containers from garden supply stores or from online retailers. But if you can’t find one, plastic containers will do too! Just make sure that they have holes to drain excess water.

Before placing soil inside your container, you might want to put pieces of broken pots at the bottom. This will hold your soil intact, and prevent them from spilling out, when you start watering.

Pour garden soil inside the container. Arrange your herbs in a manner that you like. Ideally, taller herbs should be arranged at the back or in the middle. Shorter herbs should go in front or around the tall herbs. If you feel that the seedlings need more soil, do so!

Make sure that the soil is always moist. It might be best to spray them occasionally, or when you think that the soil is starting to dry out already. You can add organic fertilizers once each month if you wish. But if you can’t find organic fertilizers, and you do not want to use chemical fertilizers, you can skip this part. Most herbs grow easily without too much maintenance. So you do not have to worry at all; so long as you are watering it and keeping the soil moist, your herbs are sure to grow healthy and will have a lengthy life.

Snip herbs when you need to use it for cooking. Just make sure to snip healthy ones, and remove the ones that have dried out already.

These are the different methods you should incorporate, if you want to grow herbs at home. They are fun to have because they not only add great taste to every dish, they can also make a beautiful accent piece in your kitchen that provides a nice aroma as well.

image courtesy of Cathedral City Guide/flickr