Showing posts with label Vegetables. Show all posts

Indoor Vegetable Gardening for Beginners: A Green Thumb's Guide

Gardening has always been associated with outdoor spaces, but what if you don’t have a garden or outdoor area? The answer lies in indoor vegetable gardening, a rewarding and sustainable way to grow your own produce right inside your home. This article is your comprehensive guide to indoor vegetable gardening for beginners, providing all the essential information to get you started on your journey to becoming an indoor gardening enthusiast.
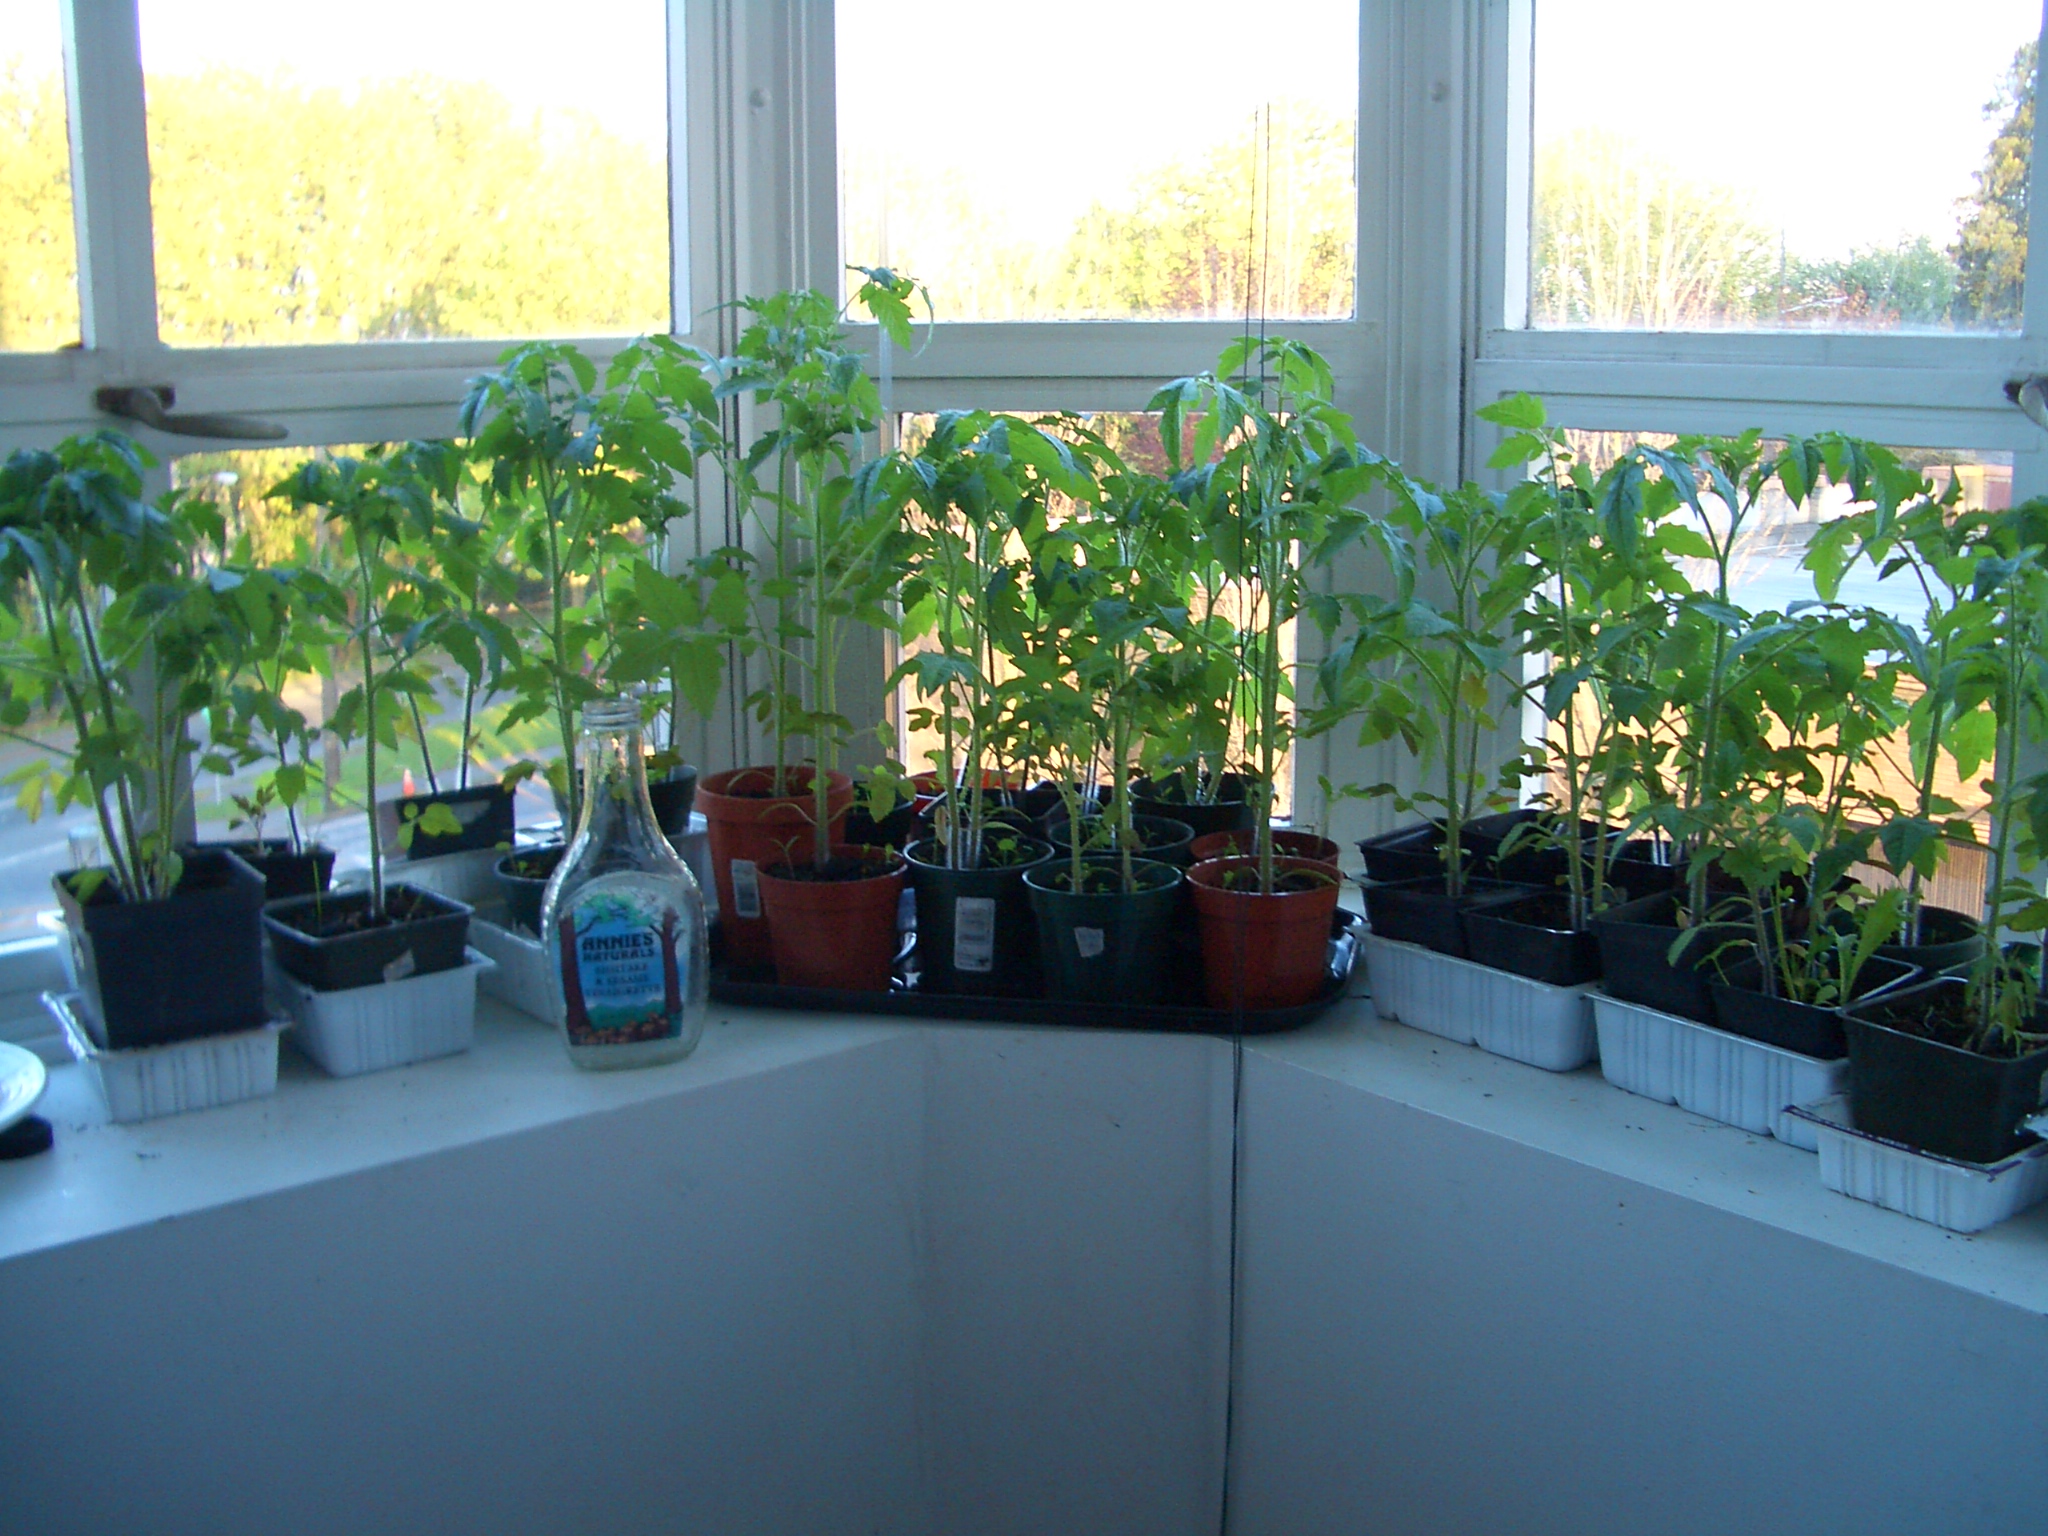
indoor vegetable gardens

Why Choose Indoor Vegetable Gardening?

Indoor vegetable gardening offers several advantages that make it an attractive option for beginners and experienced gardeners alike:

Year-Round Gardening: Unlike outdoor gardening, indoor gardening allows you to grow vegetables throughout the year, regardless of the season.

Control Over Environment: You have complete control over the indoor environment, including light, temperature, and humidity, which can lead to healthier plants and higher yields.

Fresh and Organic Produce: Homegrown vegetables are not only fresh but also free from pesticides and chemicals, ensuring the highest quality and taste.

Getting Started

Selecting the Right Location: The first step is to choose an appropriate location for your indoor garden. Look for a spot with plenty of natural light, such as a sunny windowsill or a room with good sunlight exposure.

Choosing Containers: Container selection is crucial. Opt for containers that are the right size for your chosen vegetables and have drainage holes to prevent overwatering.

Soil and Potting Mix: Use a high-quality potting mix that provides proper drainage and aeration. You can also create a custom soil mix suitable for the vegetables you plan to grow.

Selecting Vegetables: As a beginner, it’s best to start with easy-to-grow vegetables like herbs (e.g., basil, mint), leafy greens (e.g., lettuce, spinach), and compact varieties of tomatoes and peppers.

Watering: Proper watering is essential. Ensure that your containers have drainage holes and water your plants when the top inch of soil feels dry. Avoid overwatering, as it can lead to root rot.

Lighting Requirements

Natural Light: If possible, place your indoor garden in a sunny window where your plants can receive at least 6-8 hours of direct sunlight daily.

Artificial Light: In spaces with limited natural light, consider using grow lights. LED or fluorescent grow lights are energy-efficient and can mimic natural sunlight.

Light Duration: Most vegetables require 12-16 hours of light per day. Use a timer to regulate the light cycle for your indoor garden.

Temperature and Humidity

Temperature: Most vegetables thrive at temperatures between 60°F and 75°F (15°C to 24°C). Avoid placing your plants near drafts or heating vents.

Humidity: Indoor environments can be dry. Increase humidity levels by misting your plants or using a humidity tray with water.

Maintenance and Care

Fertilization: Indoor plants need regular feeding. Use a balanced, water-soluble fertilizer every 2-4 weeks during the growing season.

Pruning and Thinning: Regularly prune your plants to encourage bushier growth and remove dead or yellowing leaves. Thin seedlings to prevent overcrowding.

Pest and Disease Management: Keep an eye out for common indoor garden pests like aphids and spider mites. Address any issues promptly with natural remedies or insecticidal soap.

Harvesting

The joy of indoor vegetable gardening culminates in the harvest. Depending on the type of vegetable you’ve grown, harvesting times vary. Here are some general guidelines:

Leafy Greens: Harvest when the leaves are mature, usually within 4-6 weeks.

Herbs: Harvest as needed, but avoid removing more than one-third of the plant at once.

Tomatoes and Peppers: Harvest when fruits are ripe and have reached the desired size and color.

Conclusion

Indoor vegetable gardening is an excellent way for beginners to experience the joys of gardening without the need for outdoor space. With proper planning, care, and attention to detail, you can enjoy a year-round supply of fresh, homegrown vegetables. So, roll up your sleeves, gather your gardening tools, and get ready to embark on your indoor vegetable gardening adventure. Happy growing!

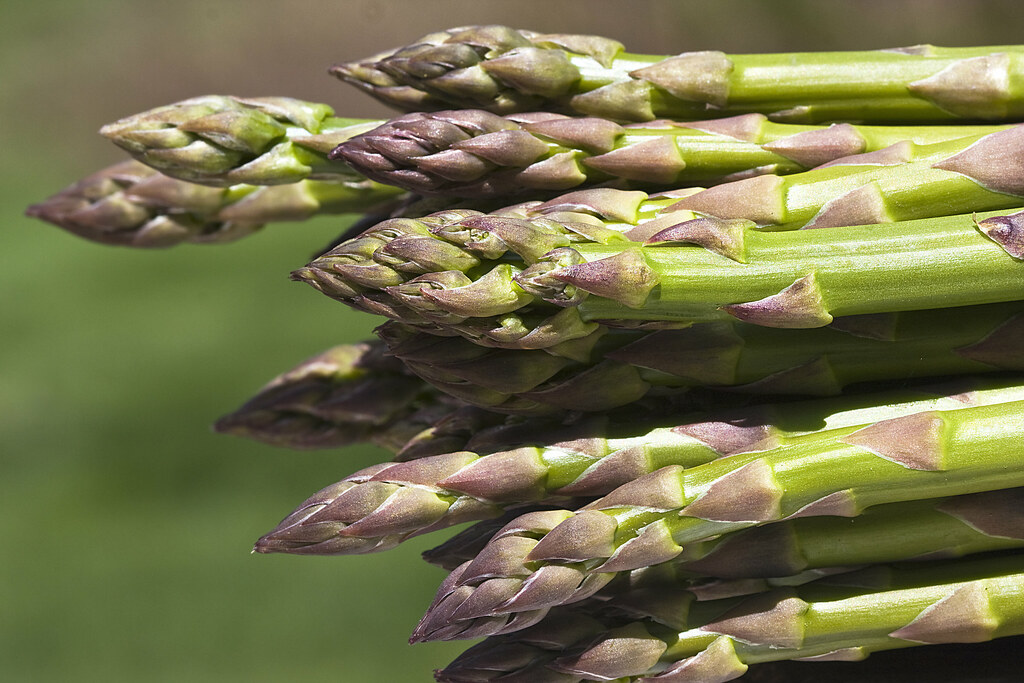
Can You Grow Asparagus in a 5 Gallon Container?

Asparagus is one of my favorite spring vegetables. It is a reliable perennial that comes up year after year, so lots of people love to grow it. However, if you do not have the room for a typical garden bed, have poor soil, are just love container gardening, you may wonder if you can grow it in containers.

So, can you grow asparagus in a 5 gallon bucket? Yes you can, but I’m afraid it is far from ideal to do so, and your asparagus will probably not live long.

Asparagus as I mentioned before is a perennial, so it comes back year after year. It grows fast and has a large root system that makes it hard to grow in a 5 gallon bucket or a container. Over wintering is another concern, along with it getting enough nutrients.

I’m not trying to discourage you from trying, gardening is fun and so is experimenting. So if you really want to give it a go, I highly suggest you watch the following video on growing asparagus in containers. You will want the largest container you can find, so a 5 gallon bucket might not be ideal.

So, I hope that video was helpful in explaining what it takes to grow asparagus in containers. Maybe with that advice you could try it with a 5 gallon bucket as well. If you are looking for a container to grow your asparagus Here are Some to Check Out

Best Tips on How to Grow Sweet Potatoes

growing sweet potatoes at home

Spring is the best time to grow sweet potatoes either by growing them starting from slips or from scratch. But if you want to do it the easy way, growing sweet potatoes from slips is the best way to go. Sweet potatoes are one of the best tasting potatoes that you can enjoy mashed, boiled, fried, or even added to a savory dish that you and your family can enjoy.

The nice thing about sweet potatoes is that they grow easily, and requires minimal care. You can also expect a large batch of harvest, which is great to share with family and friends.

To grow sweet potatoes, here are the steps that you should do:

Step 1: Choose Your Sweet Potato

We have already mentioned that growing sweet potatoes can start from slips. Slips are the small outgrowths that can be found in the plant. You can use the slips to make new sweet potatoes. Slips can be purchased from online retailers or from garden supply stores. But if you have the time and experience, you can also grow your own slips.

Step 2: Cut Your Sweet Potatoes

If you want to do it from scratch, cut two sweet potatoes in halves and wash them. Make sure that these potatoes are untreated, fresh, and healthy, in order to yield the same for your harvest.

Step 3: Place Your Sweet Potatoes In The Jar

Get a clean jar with an opening that will fit your potato. Fill it with water. Skew the potato with sticks and allow it to hung from the opening, living half of the potato submerged in water, while the other half is exposed in air.

Step 4: Sweet Potato Slips

After a few days or weeks, you will notice the slips growing from the potato already. Snip the slips and plant it to make new sweet potatoes.

Step 5: Grow The Roots Of Your Sweet Potato Slips

To prepare your slips for planting, you must first grow the roots. You can do this by submerging the slips inside a jar full of water.

Step 6: Plant Your Sweet Potato Slips

Now that your slips have roots, it is now ready for planting. Choose your garden bed. The garden bed should be in a place where there is direct sunlight always. This is because sweet potatoes love the warm weather. Sweet potatoes grow under the ground so you do not have to do anything, aside from watering it, after planting the slips. Just make sure to at least plant the slips 6 inches deep, where the half part of the plant is submerged in soil. Also, since sweet potatoes grow underground, you might want to make sure that the soil is a bit loose, to allow easy tilting under.

These are the different ways that you have to do, if you want to grow sweet potatoes. Sweet potatoes are easy to manage, easy to plant, and yields a good amount of harvest that will surely delight you.

How to Grow Sprouts

If you enjoy making recipes involving sprouts, then you might also want to learn a few basics on how to grow sprouts at your own home, so that you can always have a fresh supply of it whether you need it for making a delicious dish, or if you just want to grow it to make your vegetable garden fuller and more appealing.

In this short article, we are going to teach you some of the very basic steps on how to grow sprouts. Please see the details How to Grow Sproutsbelow:

The first thing that you have to do is to find seeds. Seeds that will turn into sprouts can be purchased in garden supply stores, greenhouses, or even at your local supermarket. You should only make sure that your seeds are untreated and healthy. Treated seeds are harder to move from its dormancy stage, which will prevent it from sprouting.

When you already have your seeds, you can now soak them. You need to soak your seeds for several hours or until a day in order to move it from dormancy. After that, rinse your seeds. Make sure to rinse it well, because this will promote your seeds to start sprouting.

After rinsing, you will also have to drain it well. Remember, your sprouts can be prone to bacteria or dirt that have accumulated in the puddle, and rinsing it well will prevent the sprouts from failing.

It is also important that your sprouts are able to breathe. This is actually one of the most commonly forgotten aspect when sprouting, which often leads to failure. So make sure that your seeds will have enough air in between washing and draining, in order for them to grow.

If you want to grow sprouts, you can often use two types of sprouting mediums. One is the soil, and one is a damp and moist medium. Either will do, but there are some sprouts that do well in soil, while some do well in a moist medium. You should know this upon doing your research about the sprout that you want to grow, or by checking out the packaging of your seeds.

De-hulling is also a part of growing sprouts, particularly if you are growing brassicas. De-hulling means removing the actual cap of your seeds, in order for them to grow sprouts. However, not all seeds require this, as the caps normally fall off when the sprouts are ready to grow.

Harvesting sprouts is actually easy, as it does not require any resistance when harvesting them from their growing / sprouting mediums. However, upon harvesting, you have to make sure to dry them before storing in order to prevent them from spoiling.

There are also several sprouting equipment that you can purchase from garden supply stores that will allow you to work on your sprouts easier.

Learning how to grow sprouts at home isn’t very hard, it just takes a bit of attention and patience.

image courtesy of dottiemae/flickr

How to Grow Rhubarb

Rhubarb is considered a perennial vegetable and they are great for pies, muffins, and more. The thing with rhubarb is that its roots cannot start growing if the soil isn’t at least 40 degrees F in temperature. It is pretty simple to grow in cooler climates. Ideally, for the most success, you want to plant rhubarb in the early spring..

Rhubarb is not normally planted using seeds because it can be very difficult or challenging to grow them. So if you want to growHow to Grow Rhubarb them with better chance of success, you can grow them by the crowns instead. You can buy rhubarb crowns from garden supply stores, nurseries, or even from independent vegetable growers online.

Now that you already know some facts about this perennial vegetable, it is now time to plant them and grow them. Below are the steps on how to grow rhubarb:

Choosing The Right Spot

Although rhubarb is fond of cooler climates and soil, they still require sunshine in order to grow healthy and with vigor. Therefore, if you are choosing a spot where you can grow them, make sure that the area has a lot of sunlight during the day. Also, you might want to allot 1 square yard of soil for every rhubarb plant that you want to grow to give them adequate space.

Preparing The Soil

Rhubarb grows best in soil that is mixed with compost/peat moss, or aged manure. If you want, you can also add commercial fertilizers. But if you want your rhubarb to be organic, you can omit the last step. Make sure to loosen the soil up to 12 inches deep. Create holes; but make sure the holes are bigger and wider compared to the crowns of your rhubarb. Cover the rhubarb plant with 2 inches of soil. Make sure that there are no air pockets inside, by pressing the soil with your palms. Water the soil to moisten it. Make sure to water your rhubarb every week.

Once your rhubarb has developed leaves, you can now put mulch on the soil. However, when it starts developing flowers, you might want to remove them, because flowers will just eat up too much energy of the plant.

It will take two years before you can actually harvest a good amount of rhubarb. To harvest it, you need to grab the stalk, twist, and pull. Usually, you only have to wait two years for the first harvest. But the succeeding harvest can happen 3 – 5 times for each season.

Just follow those simple steps on how to grow rhubarb and you will have a patch that continues to produce year after year. Rhubarb is delicious, sweet, and refreshing. It can be used in a lot of ways in the kitchen. That is why growing them is such a treat.

image courtesy of elizaIO/flickr

How to Grow Potatoes in a Container

Potatoes are one of the most commonly purchased crops in the market today. Many of us use potatoes at least 3 times a week, making delicious hash browns for breakfast, mashed potatoes for lunch and dinner, and practically using them in so many ways in a lot of the dishes we know.

Potatoes grow in a wide variety of sizes. Larger varieties obviously require more space for them to grow into the right size. ButHow to Grow Potatoes in a Container if you have limited space at home, and all you can use are containers to grow potatoes, this is also possible!

If you want to know how to grow potatoes in a container, follow the steps below and achieve great results on your harvest.

 Step 1: Fingerling Potatoes

Since you have limited space, the best variety of potato that will best grow in a container is the fingerling variety. This type of potato does not normally grow more than 3 inches. Use seed potatoes that are small. If they are 3 inches or sometimes bigger, you might want to cut them into two to three pieces.

Step 2: Produce Sprouts

Get your seed potatoes and arrange them in a tray. Spray water to moisten them, and place them under the sun. Soon, they will produce sprouts. Once they do, get them, because at this point, they are now ready for planting.

 Step 3: Prepare The Container

Make sure that your container has holes. This will allow excess water to drain. You do not want water to sit in your container, as this will rot your potatoes for sure. Once you already have the holes, place a wire mesh inside the container, then pour in your potting soil. The wire mesh will prevent the soil from spilling, which can happen, when you start watering the potatoes.

 Step 4: Planting The Sprouts

Once your container is ready, place your potato sprouts inside, and plant them at least 2 inches deep. If you are planting your potatoes in a big container, you have to make sure that they are at least 4 inches away from the sides of your container, and that they are also 6 inches apart from each other. That way, they will be able to have enough room to grow for its roots. You should also place 2 inches of oil on top. Mixing compost and manure will enrich the soil too. Actually, you have to add soil (2 inches) every time your potato plant grows 6 inch taller. That being said, you will have to make sure that your container is deep enough to accommodate the additional soil that you have to place, as your potato grows.

 Step 5: Harvest Time

When your potatoes grow flowers, this is already a good sign that they have fully matured already. Ideally, you need at least 2 months from the time you have planted the sprouts in order for you to do your harvest.

This is how to grow potatoes in a container that turn out wonderfully.

image courtesy of Hair Squared/flickr

How to Grow Peas

Some people think that peas only grow in areas where there is cold weather. Actually, this is not true! Peas can grow anywhere; as long as you follow the steps that we have for you below, you will be able to enjoy fresh, crisp, and plump peas all throughout the year.

Peas are great for almost any type of meal for the day. It can be a nice side dish for breakfast, garnishing for a delicious lunchHow to Grow Peas and dinner, and so on.

If you want to know how to grow peas no matter where you live in the country, go ahead and follow the steps I have for you below, in order for you to achieve successful harvest.

Choose Your Planting Spot

Peas love the sun, so you have to make sure to choose for a spot where there is always sunlight. If you have an area facing the south, that would be the best spot to grow your peas.

Your soil should also be a bit acidic. Make sure to test your soil, and make sure that the PH level is at least 6 or 6.8. You can have your soil tested, and add nutrients into it in order to achieve the right PH.

Peas also love moist soil. So you have to make sure that the soil is well draining. Peas that are overly watered will die, so do not overdo your watering. You can also add compost to your soil, as your peas will love well cultivated soil. Do not add nitrogen anymore as peas will have enough nitrogen from the air.

Choose The Type Of Peas

Once your soil is prepared, you can now plant your peas. Peas come in different types, and choose the one that will serve the purpose after harvest.

When planting your peas, make sure to plant them one inch deep. If you are planting multiple seeds, make sure that they are at least 4 inches apart. That way, they will have more room to grow under the soil.

Guide Your Peas When Growing

Remember that peas grow in vines. So you have to install trellises around each plant, and you have to guide them during their first sprouting. Once they are long enough, your peas will know where to cling already.

Nurturing Your Peas

Water your peas every week with at least ½ inch of water. Nothing more than that. If you water your peas too much, there is a great chance for it to die.

Remove weeds growing around your peas, so that all of the nutrients of the soil will only be concentrated on your peas.

Harvest Time

Continue nurturing your peas until they have already developed flowers. Once you see flowers, you can already start counting the days for your first harvest. Normally, you only need at least 3 weeks for you to harvest peas from the time you have seen the first flower on your vine.

These are the different methods for growing great peas.

image courtesy of eraphernalia vintage/flickr

How to Grow Onions

Onions are very tasty and make so many dishes savory. It can be used in a wide variety of dishes from appetizers, soups, and of course in main courses. Growing your own onions is a nice idea, because not only do they grow easily, they also need very little space in your garden, which is good for people who want to start a small vegetable garden at home.

One more thing that you will like about onions is that they grow fast and it has a long shelf life. Meaning, you can harvest a largeHow to Grow Onions batch during the spring time when onions are best planted, and store them up to make a delicious onion soup that is perfect during the winter.

So if you want to grow onions, here are the ways to do it:

Choose Your Onions

Onions do come in different varieties that are often categorized by color (yellow, white, and red), and of course by growing type (long day & short day). Long day onions start to sprout early when the day is longer (about 14 to 16 hrs / day) and short day onions grow when the day is shorter (about 10 to 12 hrs / day).

Onion Seeds Or Bulbs?

You can plant onions by either planting seeds or bulbs. If you have no experience yet, professional vegetable gardeners prefer that you choose bulbs over seeds. This is because onion bulbs are easier to grow since they have the ability to withstand most distractions during the growing season. But if you prefer growing your onions from seeds, you may still do so.

Plant Them Indoors First

Unless you live in an area that constant has below 20 degrees F in temperature, you must plant your onions indoors, so that you can manage the temperature easily. The best time of the year for you to plant onions is during the spring time when the frost is out, and the sun is up. Onions can die during the cold weather, that is why.

Taking Them Out

When your onions are ready to be planted outside, make sure to plant them in an area where there is direct sunlight. Onions love the sun, and this will make them grow healthier and more flavor. Furthermore, you must give them enough space to grow. If you want bigger onions, you have to plant them far apart.

Nurturing The Onions

Make sure that the soil is properly nourished and free from any weeds. However, always remember that onions have very fragile roots. So be extra careful when weeding your patch, to make sure that you are not damaging the roots of your onions.

Harvest Onions

You should know when the onions are already ready for the harvest when the top is already golden in color. Pull the onion by grabbing the sprout, and gently lift it with one hand.

Onions have a good shelf life, so all you need is dry them, clean them, and place them in a dry place to keep them fresh.

image courtesy of quinn.anya/flickr

How to Grow Mushrooms

Mushrooms are delicious, nutritious, and make a wonderful dish all the time. Growing mushrooms is actually very easy. In fact, growing your own mushrooms will also give you the peace of mind of eating it with pleasure, minus the worry that you might be eating something that can make you sick.

Furthermore, weight watchers and the health conscious people should really learn how to grow their own mushrooms. BecauseHow to Grow Mushrooms aside from its health benefits, mushrooms are also great for people who want to lose weight, since mushrooms are very low in fat and calories.

Mushrooms love the indoors. This is another advantage if you hate going under the sun to grow your own food. So if you have a closed yet well ventilated and easy to manage space at home, you can use it to grow mushrooms.

Here are some tips to remember when growing mushrooms:

Choosing The Type Of Mushroom To Grow

There are several mushrooms that are popular in dishes these days. They are the shitake mushrooms, the button once, and the oyster mushrooms. They are all very easy to grow, but you have to give them the right place where they can grow conveniently. Ideally, all can grow on straw or even in sawdust. But to give them the proper environment where they can get proper nourishment, make sure to follow the list below:

Oyster mushrooms = straw

Shitake mushrooms = sawdust

Button mushrooms = manure with compost

So these are the proper, or shall I say ideal growing places for mushrooms that you might want to consider, depending on the type of mushroom that you want to grow.

Spawns

Now that you have a growing media for your mushrooms already, you should now buy your spawns. Spawns are more ideal compared to spores. This is especially true, if you do not have experience in growing mushrooms yet. You can buy spawns online, in a local farmer’s market, or even at a gardening supply store.

Preparing The Growing Media

Before placing your spawns on your growing media, you have to sterilize it first, in order to kill any microorganism that might interfere or contaminate your spawns. You can do this by heating the media inside a microwave oven for at least two minutes. You might want to damp the media with a little water too.

Heat Will Promote Growth

You might want to heat a pan up to at least 21 degrees C. Place the growing media on top of that, and spread the spawns on the growing media. Leave the pan with the spawns and growing media on top, and place in a room that is dark. This kind of environment is ideal for mushrooms to grow quickly and abundantly. This process will take 3 weeks. After that, you will have to transfer it in a room where the temperature is colder (at least 13 degrees C).

Harvest Time

Wait about 3 weeks again, and after that, you will already see mushrooms sprouting.

image courtesy of Dawn Endico/flickr

How to Grow Lettuce

Do you enjoy eating a bowl of fresh greens every day? If so, then growing your own lettuce might appeal you. Keep in mind that although lettuce (of different kinds) are always available in stores, they do not have a long shelf life, even if you place them inside the refrigerator.

So to make sure that you will always have fresh and crisp lettuce in every garden salad that you make, go ahead and learn the How to Grow Lettuceways on how to plant lettuce at home. Believe me; planting and growing lettuce is not as hard as you think!

Here is how to grow lettuce at home:

Lettuce Seedlings

If this is your first time to plant lettuce, it is always recommended that you start with lettuce seedlings. It is easier to grow lettuce when roots have been established already. You can buy lettuce seedlings from a local farmer’s market or you can also check who are selling them online. There are many independent lettuce growers around, so you will not have a hard time finding them.

Choose The Planting Area Wisely

Lettuce like it best when the weather is cool and when there is sunshine as well. So it is best to plant them where the sun touches the area. The soil should also have at least a PH of 6. You can work on your soil’s PH easily by just adding mulch or agents that you can buy from garden supply stores. You might also want to plow the soil so that they will be crumbly and you must remove the stones and weeds alongside it. Mix in compost and manure to your soil before planting your lettuce seedlings.

Planting The Lettuce

When planting your lettuce seedlings, make sure that there is at least 8 inches open space in between plants. This will promote proper growth for your plants, because air will circulate better, and the roots under will have enough room to grow.

Nurturing The Lettuce

It is always best to water your lettuce just enough to moisten the soil. However, when watering lettuce, it is best done in the morning, so that the leaves will have enough time to dry. This will prevent bacteria or fungus to build up at night.

Harvesting Lettuce

Harvesting lettuce is easy. All you need to do is cut the leaves when you see that they are already fully grown. If you see that there are some leaves that are just sprouting, avoid cutting them. This will still grow and produce another batch of good harvest.

The nice thing about lettuce is that you can use them in a lot of ways. Aside from making a nice bowl of garden salad that is good for your body and health, you can also use it to make side dishes like coleslaws and use it to make delicious sandwiches that makes a healthy lunch.

These are the different ways to grow your own garden of fresh lettuce at home.

image courtesy of timsackton/flickr

How to Grow Ghost Peppers

Do you love spicy dishes? If so, then you might be interested in growing ghost peppers. In case you do not know yet, ghost peppers are the spiciest peppers in the world. It was first discovered in India, and it is said to be hotter than jalapeños or even habenaros.

Anyway, you do not need to live in India if you like to source ghost peppers. In fact, you can start growing them in your home, How to Grow Ghost Peppersso that you will always have a fresh stock of it, in case you want to fire up a dish with its spiciness and impress your guests.

Here are the different steps that you can do, if you want to grow ghost peppers at home:

The first thing that you have to know is that it takes quite some time before you can do your harvest. Therefore, you have to make sure that you have the perfect environment for it to grow healthy, and the patience too, so you will continue feeling motivated to see what your harvest will look like.

To germinate the seeds of the ghost peppers, you will need at least 35 days. Then from germination, you will need another 150 days, before the plant produces fruit.

So the first thing that you have to do is to plant your seeds. Make sure that your soil is nourished enough, and should be well draining as well. Water cannot sit inside your container, otherwise, your seeds will not produce sprouts.

Ghost peppers also like warm soil. Therefore, you have to make sure that your soil is at least 90 degrees F. You can do this by placing your garden bed on top of a heating plate.

When your sprouts are starting to show from the seeds, you might want to help it germinate more, by placing a CFL lighting. Continue moistening the soil. Moisten only, just so it will not dry. Do not overwater.

When your sprouts are at least a week old, you can start exposing them under the sun. That way, the sprouts will already be accustomed to the new environment, in preparation for their transplantation.

Start transplanting your ghost peppers in the ground when they are at least 6 inches tall. Make sure to plant them deep enough so that the roots will continue growing. Make sure that each plant is at least 24 inches away from each other. They need that amount of space to grow their roots, for proper air circulation, and for them to grow freely.

Water your newly transplanted ghost peppers. Wait for it to grow fruits, and wait for the actual fruits to change its color, before you go ahead and harvest it.

By the way, if you want to boost pollination in your chili garden, it might help if you plant different varieties of hot peppers beside your ghost peppers. A good choice would be habenaros and bhut.

These are the different steps, if you want to grow ghost peppers.

Image courtesy of Greenhouse17/flickr

How to Grow Eggplant

If you are new to vegetable growing, then growing eggplants might be the best that you can start with. Eggplants are really nice to look at both in the garden and on the table. It comes in a wide scale of variety, which is why you can see eggplants in different shapes, sizes, and colors.

Eggplants are also very easy to grow. This is probably one of the reasons why newbies in vegetable growing might want to startHow to Grow Eggplant with this particular vegetable. It requires less knowledge in gardening, and maintaining eggplants is also never a challenge.

Here are some of the tips that you might want to consider, if you want to plant eggplants:

Choosing The Area

Make sure that the area you are choosing for planting your eggplants will have long hours of sunshine. Eggplants love the warm weather, that is why. The soil should also be well draining, so that water will not sit at the bottom and damage the roots. The PH level of the soil should also be at least 5.8, and adding lime to the soil might also be best, because eggplants grow better in soil that is high in calcium.

Seeds Or Seedlings

The nice thing about eggplants is that you can start by either planting them starting from seedlings, which you can buy in most garden supply stores or nurseries, or you can also buy seeds from the same sources, or you can find them too from the garden section in your favorite grocery stores.

If you plan to start from scratch, you have to start planting your seeds indoors first. That way, you can manage the temperature easier, to make sure that your seeds will germinate well, and produce healthy sprouts fast.

Planting & Transferring

When your seeds have already sprouted, and the plant is about 1 to 2 inches tall already, you can now transfer it to your garden, where it will continue growing. However, if you live in cold areas, you have to make sure that the ground is already warm (preferably 60 degrees Fahrenheit), and frost is already out. Eggplants have a slim chance of survival in the cold, so this is something you want to consider closely.

If you bought seedlings instead of seeds, you also have to transfer it to the ground, at the same recommended time.

Make sure that the eggplants are 18 inches apart, so that their roots will have room to grow under. This will also give the actual branches of the plant to grow fuller, because eggplants tend to grow big and bushy.

Nurturing

Eggplants should be watered every week with at least an inch of water. That way, your eggplants will have enough nourishment from the moist soil.

Harvesting

You should know when the eggplants are ready for harvesting when they have already achieved a uniform color, and when they have grown to the right size already.

These are the different ways that you should try, if you want to grow eggplants.

Image courtesy of garlandcannon/flickr

How to Grow Cucumbers

Cucumbers are great to have inside the fridge, especially during this hot season. They are very refreshing and flavorful, which you can use for garden salads, soups, side dishes, and so much more! In fact, you can also use cucumbers to aid tired and puffy eyes.

The thing with cucumber that you buy from stores is that some do not have that sweet and very refreshing taste. Instead, they How to Grow Cucumbershave this intense bitter flavor, which is very hard to determine without cutting and tasting it. So to make sure that your cucumber will taste refreshingly sweet, you have to make sure that they are properly nourished while they are growing.

If you want to know how to properly grow cucumbers in your own garden, here are the steps that you have to do:

Cucumbers Love Water

The key to produce refreshing and flavorful cucumbers is to keep them hydrated. You have to water them regularly, to ensure that the soil is always moist. The amount of water needed will depend on the kind of soil that you have, and the weather as well. Remember, stressed cucumber plants often produce bitter cucumbers. Stress is often a result of plant dehydration.

Mulching

Mulching will also help your cucumber plant to grow healthy and produce fresh tasting cucumbers. Mulching can also prevent weeds to grow near the cucumber plants, which is great, because your plants will not share the nutrients coming from the soil. Mulching is often best to be done when it is already summer, or when the soil is completely warmed up.

Temperature

The thing with cucumbers is that they can be quite tricky to grow. They do love the heat of the sun, so they are best grown during the summer. However, cucumbers can also be very sensitive to heat. When the temperature is not managed properly, they will not produce good quality fruits, and they will not produce an ideal amount of harvest. Shading your cucumber plant is a good idea to control the temperature. You can either provide an artificial shade to control the amount of heat coming from the sun, or to plant higher plants beside it, to provide natural shade. Remove weeds that will share the nutrients of the soil too!

Harvest Cucumbers

When your cucumbers are starting to form, and you see that they are green all over, that is a good sign that they are ready for harvesting already. If you leave them for a long time in the vine, you will end up having hard and stiff cucumbers that is not ideal for eating anymore. Ideally, when you start harvesting the first batch, expect to harvest the next batches every 2 days.

Once the cucumbers are harvested, it would be best to keep them inside separate plastic bags so that it will keep its moisture inside.

These are the different ways that you can do, in order to grow fresh, sweet, and flavorful cucumbers that will freshen you up during a hot summer day.

image courtesy of Dorocia/flickr

How to Grow Corn

There are so many benefits that one can get from growing their own vegetables at home. It is great to be able to serve your family garden fresh fruits and vegetable. They are healthy, nutritious and taste great. In this article I’m going to show you how to grow corn.

Corn is one of the staple foods that we eat. We can have them in almost any time of the day, and corn is a great source of many How to Grow Cornvitamins, minerals, and fiber that is good for our body and health.

Corn can be grown at home with very minimal knowledge and skills. Below are the different ways that you can do, if you want to grow corn at home:

Choosing Your Corn

Know the type of variety of corn that you want to plant. This is because you have to know beforehand if the corn can live in the kind of climate that you have, as well as the PH level of your soil. Good thing that you can do several things to control the temperature where your corn is planted, you can also change the level of the soil’s PH, by just adding agents on the soil.

Most people intend to plant sweet corn, as this type of corn has the most use in most households. You can eat them on the cob, or you can also process them by canning them, to lengthen its shelf life. If you are planning to plant sweet corn, then you might want to check the different varieties of sweet corn that is determined by the level of sweetness that they have. You should check the following signs on the packet:

SU – semi sweet

SE – sugar enhanced

SH2 – super sweet corn

Planting Your Corn

Ideally, the best time to plant corn is when the soil is warm. If the soil is cool or cold, you will end up having rotten seeds. You should also choose an area where the corn will receive full sunlight for quite a number of hours during the day. You might also want to remove the weeds in that area regularly, as corns will have a difficult time growing when they share the nutrients of the soil with the weeds.

Experienced farmers know to plan their crops. Normally, they plant corn after the harvested peas or beans. This is because peas and beans leave a good amount of nitrogen in the soil, which corn plants love. But this does not mean that you have to plant beans before corn. What I am just saying is that you might want to enrich your soil with nitrogen, in order to give the needed nutrients of your corn plant.

Harvesting Corn

When your corn is about 12 inches at the very least, this already means that it is ready for harvesting. Another indication if the corn is already ready for harvesting is if has already developed silky strands of brown hair. Twist the corn and pull them when harvesting.

image courtesy of Meg Stewart/flickr

Tips for Washing Produce

Fruits and vegetables are an important part of a healthy diet. So, how do we go about keeping our fresh produce safe to eat?

Here are some simple tips for washing produce:Tips for Washing Produce

  • Use a clean pair of scissors or knife to open your bags of produce
  • Fruit and vegetable peels may carry bacteria that can spread during peeling, cutting, or eating. Wash all your fresh fruits and vegetables with cold tap water immediately before eating. This applies to all fruits and vegetables like bananas and oranges; even your pre-washed fruits and vegetables.
  • Scrub your firm fruits and vegetables with a produce brush or produce rag to clean them.
  • Remove and discard the outer leaves on lettuce.
  • After washing place your produce into a clean container, not back into the original bag.

These are just a few tips for washing produce that will keep all your fruits and veggies safe to eat.

image courtesy of muammerokumus/flickr

How to Grow Carrots in Pots

Carrots are very versatile. This is because you can enjoy them cooked or even raw. Carrots can make delicious cooked dishes. It can also be a nice snack that you can munch on, which is actually better than chips. Carrots are high in vitamins and minerals that will promote good health. So if you want to make sure that you will always have fresh and crisp carrots at home, here are the ways that you can do, in order to grow them at home.

The nice thing about carrots is that you do not always need to have a large lawn or garden to grow them. If you have deep pots How to Grow Carrots in Potsat home, you can already use that to plant carrots.

Here are the ways on how to grow carrots at home in pots:

Choose Your Carrots

Since you are growing carrots in pots, it means that you might want to choose a variety that does not grow too much. Check this type of variety from a local nursery or from an online retailer of vegetable seeds.

Choosing Your Container

You can buy containers from garden supply stores that is deep enough to hold carrots, and has holes, so that it will drain the excess water. When you have already chosen your container, clean them and make sure it is free from any bacteria from dust or from a previous soil (in case you have already used this container already).

Preparing The Soil

Make sure that your soil is loose. This will help the roots grow as far as it can. You must also mix your garden soil wit compost or perlite to make sure that your soil will have enough nutrients to produce healthy carrots.

Pour the soil into your container, but leave at least an inch of empty space above. Create tiny holes, big enough to fit the seeds of the carrots. Make sure that the holes are at least 3 inches apart.

 Nurturing

Water your carrots daily to ensure that the soil is moistened. Make sure that excess water will drain, because if the water sits inside the container, it will stop the carrots from growing, and possibly kill them as well. Once your carrots are starting to grow, there is a tendency for the top to be exposed. If this happens, make sure to cover it with more garden soil. Because if not, the top part will be stiff and become inedible.

Harvesting Carrots

Normally, you can harvest carrots two months after you have planted them. But this will still depend on the type of carrot that you planted. You might want to check on the packet for this. But as a general rule, if you want your carrots to be sweet to the bite, then you might want to harvest them at the earliest time possible.

These are the different ways that you can do, if you want to grow carrots at home, inside individual pots for your own consumption.

image courtesy of Betari Ratih

How to Grow Broccoli

Many are finding the right guide on how to grow broccoli, so that they can always benefit from a fresh and healthy harvest that will not only make delicious meals, but will also help them keep their health at tip top condition.

According to medical researchers, broccoli is high in vitamins and essential nutrients, including a cancer fighting agent calledHow to Grow Broccolisulforaphane. This is probably the reason why broccoli are currently one of the most popular veggies that people will always remember buying when they are out for a grocery shopping.

If you want to grow broccoli, here are the steps that you have to do:


  1. Plan where you want to plant your broccoli – broccoli grows as tall as 3 feet. Therefore, if you are fond of planting vegetables, and you plan to plant it near something else, make sure that the broccoli will not shade the nearby plants. The soil should also be well draining, and the area where you want to plant broccoli should have enough sunlight and shading.
  2. Soil PH – If you want to grow abundant and quality broccoli, you have to maintain the soil’s PH to at least 7. You can do this by adding compost or manure to your soil.
  3. Seeding – if you live in warmer areas, you have to plant the seeds at least early in spring. If you live in cooler areas, you have to do it at least two months before the last frost.
  4. Add more compost and manure – when your plant is starting to grow, at least half inch, add compost to the soil. Doing this will add more nutrients to the soil, which your broccoli plant will need for proper nutrition.
  5. Hydrating the plant – ideally, your broccoli plant will need 2 inches of water at the most every single week. The amount of water needed and the number of times you will need to water it will depend on the climate in your area.
  6. Mulching & Protecting the plant – to maintain proper soil moisture, mulch the area. Mulching will also prevent weeds to come near and share the nutrients of the soil. Place paper collars around each crown in order to protect the actual broccoli from insects and prey such as cutworms.
  7. Harvesting – the way to know if a broccoli is ready for harvest is to look at the size of it and the color. Ideally, the color should be green overall. Do not wait for it to turn yellow. If you think that it has reached the right size already (similar to what you see from the grocery stores), then this is the best time to harvest them already.

These are the different steps that you have to make, if you want to grow broccoli. This dark green vegetable is a member of the brassica crop. This particular group of vegetables is well known to fight a lot of illnesses and diseases, including a very life threatening disease called cancer.


How to Grow Beans

The nice thing about growing beans is that they are very easy to grow and very easy to manage. You can also plant different varieties of them all at the same time, as they all need the same level of nurturing and environment. Beans are normally classified into three different types; dry, shelled ones, and the snap beans.

If you have a vegetable garden, you might always want to include beans into the variety of your veggies, as beans are high inHow to Grow Beans protein and a lot of vitamins that will help you achieve a leaner and healthy body.

To start growing beans, here are the steps that you have to do:


  1. Choosing the area – it is important to choose your area wisely, because you have to make sure that the area where you will planting your beans will have at least 5.5 for the soil’s PH. Furthermore, the area should also receive a lot of sun, in order for the beans to grow healthier and with vigor.
  2. Enrich your soil – it is always recommended for you to mix your soil with potassium and phosphorus. You can omit nitrogen, because beans can source nitrogen from air.
  3. Planting the seeds – when the soil has already reached at least 55 Degrees F, you can now start planting your seeds. The seeds should be planted at least an inch deep, and they should be at least 4 inches apart. If you are planting multiple bean plants, you can do them in a row, and make sure that each row is at least separated by 3 feet.
  4. Support your plants – at about the same time after planting your seeds, you should also start making your plant supports. Keep in mind that beans grow in vines, and they need support where they can cling on. Doing it early is better, because you might end up damaging the roots of your sprouts when you choose to set-up your support at a later time.
  5. Prune – you might also want to cut the vines that are starting to crowd the place. Beans will also need an ample space in between plants, so that there will be proper air circulation between them.
  6. Watering – beans will also need nutrients from water. So make sure to water your beans at least once a week with 1 inch water. Do not overwater because doing this can be bad for them as well.
  7. Mulching – once your beans have already developed the second batch of leaves, you can nurture it with mulch or compost. Doing this will help you yield more during your harvest.
  8. Harvest time – the time of harvest will always depend on the type of beans that you have planted. Check the packet of your beans to know if it is already time to harvest them. But as a general rule, you might not like to harvest beans that have stayed too long on the vine. These beans are not best for eating anymore, but they will serve you well when producing new batches of plants for the next planting season.

image courtesy of Mason Masteka/flickr

How to Grow Asparagus

Ideally, asparagus are planted when the soil can be managed already. The best time for planting asparagus is any time during the spring. Early spring is better. The soil where you will plant asparagus should also have a good mix of compost, manure, and garden soil in order to provide proper nutrition and nourishment. These are just some of the basics that you need to know, if you want to grow asparagus.

To give you a more detailed guide on how to grow asparagus, please see the list below:

You know when spring is coming when you start seeing asparagus all over the market. But have you ever considered growing How to Grow Asparagussome for your own consumption? Actually, if you are conscious about your health, growing your own food provides better results, since you know what comes into your mouth. Of course, you would like to stay away from foods that are contaminated with chemicals, and choose foods that were organically grown, which translates into food that is safe to eat.

The first thing that you have to know about asparagus is that it is very choosy when it comes to climate. Asparagus grows better when you live in areas where the ground freezes during the winter time. But it can also grow equally good in areas where the land is super dry during the summer. Anywhere in between (ex. Wet summers, mild winters) will not be good for growing asparagus. So what I am saying is that you have to know whether or not your area can grow asparagus.

The second thing you need to understand when it comes to planting asparagus is that they take a lot of time growing! Let’s say you want to start from scratch (seeds), this will take you 3 years at the very least to start seeing the long strands. Now, if you want to shorten the growing period, then you can start with the crowns already, which is possible, because crowns can be purchase from farmer’s market, garden supply stores, or even online. Growing asparagus from crowns will only require 2 years, which is still lengthy, but at least you were able to cut a year of waiting.

 Harvesting Asparagus

After waiting for 2 to 3 years, you will be able to harvest asparagus already. However, it can be hard to tell how much harvest will you yield, as the procedure of growing asparagus can be a bit challenging, wherein transferring the asparagus into a different soil (which is needed when the asparagus have already developed roots), can still damage it and kill the spears.

Normally, you know when your asparagus is ready to be harvested when the tips are kind of loosened already. Another sign is its height. If the spears have already reached at least 6 inches, then this is the right time for you to cut it, and enjoy your long awaited harvest.

These are the different ways and tips that you might want to consider, if you want to know how to grow asparagus the right way.

image courtesy of one|27/flickr