How to Grow Grapes in Your Backyard

The process of growing grapes requires time and lots of patience. So if you are really determined to grow your own grapes at home, then you might want to put your focus and full attention into it, so that you will be able to reap a good harvest for you and your family to enjoy.

Ideally, grapes can be grown starting from a graft or cut-outs from existing grape vines. However, this might not be possible atHow to Grow Grapes times, because you might not have a good source of it. Grape seeds are always available; it is harder to grow, but the being able to grow them will surely give you a lot of reasons to be proud of yourself.

So here are the steps to grow grapes:

Choosing Your Grapes

In case you do not know, there are thousands of different varieties of grapes. Some are good for eating, some are great for making jam, while some are just good for decorative pieces in your garden. That being said, you should choose the type of grape variety that will meet your demands after harvest. Climate is also another factor that you have to consider if you want to grow grapes. Choose the type of grapes that will grow on the kind of climate that you have.

Once you were able to determine the type of grapes that you want, buy them from garden supply stores or online retailers of seeds.

Preparing The Seeds

Once you are able to get the seeds, make sure that the seeds you will be planting are of the best and healthiest. Discard the ones that are not. Place them in water. Everything that sinks under are healthy. The one the floats, are not. Remove them.

Soak the seeds for at least 24 hours in distilled water. After soaking, prepare a medium where they can start to germinate. Moistened paper towels will do. Since grapes love the cold climate, you might want to keep them inside the refrigerator during the initial germination process.

After refrigerating, you will now have to plant the seeds. One for each small pot. While in the pot, you have to maintain at least 70 degrees F. If you are not quite sure about managing temperature manually, you can use greenhouse warming mats.

Watering grapes should include misting or spraying only. Never pour water, or your grape seeds will not grow. Grape sprouts should start to show in about 2 to 8 weeks after planting them in pots.

When your sprouts have reached at least 3 inches, it is now time to transfer them in the ground, to allow them to grow further. Make sure that your grapes will have something to cling on, since their vines will start crawling. You can make trellises around each plant. By the way, when planting your grapes outside, you have to make sure that your soil is well draining.

Harvest time is easy to tell. This is when your grapes are already fully grown in size, and the color has already changed.

Image courtesy of Otto Phokus/flickr

How to Grow Ginger in Colder Climates

Ginger is what they say a tropical crop. It grows in warmer areas only, including the beautiful Hawaii in the US. You need at least 8 – 10 months of warm weather if you want to grow ginger. This is the reason why majority of the places in the US cannot grow ginger in normal lands. But just in case you want to try to grow ginger at home, here are the things that you have to do: make sure that you have an indoor space where you can plant ginger, and the temperature can be closely controlled to keep the ginger warm.

Hydroponics is the only possible way for you to plant ginger in colder areas. In this process, baby (immature ginger) is planted How to Grow Gingerin a mixture of peat as well as perlite. When the ginger has already developed roots to as much as 3 inches long, they will now be transferred into a different bed, where water is treated with Chem Gro 8-15-36 along with magnesium sulfate and calcium nitrate. The process starts in May, and harvest time will begin sometime in October.

Hydroponics is a method used by commercial growers to ensure a good amount of harvest that will meet the demand of the market. But if you want to grow ginger in your own home, you can also try a simpler method. However, since ginger is quite sensitive to the cold weather, you might want to do a little research on how to properly manage the temperature on where you want to grow your ginger. Furthermore, you have to manage your expectations, as the success of ginger growth might not happen quickly or possibly. Nonetheless, there is no harm in trying.

Successfully growing ginger is one of the most rewarding things you can ever experience. Despite the fact that you know it is hard to grow in colder weathers, you can also use ginger in so many ways; you can make delicious stir fried dishes with it, and you can also create hot drinks from it, that are not just tasty, but good for your health as well.

Some people find success growing ginger by getting an untreated and healthy ginger root from the grocery or from a farmer’s market. Then, you have to soak it in water, and plant it in a 12 inch deep hole. The soil should be loosen, so that you will give an ample amount of space for the roots to grow. Make sure that your pot is placed where there is direct sunlight. This will ensure warm temperature. Water your ginger regularly as well. Be patient because ginger will take at least 10 to 12 months before it starts to reach maturity. You can also use organic fertilizers to give your potted soil some nourishment.

This is a basic way to grow ginger at home. With proper care and nourishment, you can expect ginger by the end of the year.

Image courtesy of andresmh/flickr

How to Grow Ghost Peppers

Do you love spicy dishes? If so, then you might be interested in growing ghost peppers. In case you do not know yet, ghost peppers are the spiciest peppers in the world. It was first discovered in India, and it is said to be hotter than jalapeƱos or even habenaros.

Anyway, you do not need to live in India if you like to source ghost peppers. In fact, you can start growing them in your home, How to Grow Ghost Peppersso that you will always have a fresh stock of it, in case you want to fire up a dish with its spiciness and impress your guests.

Here are the different steps that you can do, if you want to grow ghost peppers at home:

The first thing that you have to know is that it takes quite some time before you can do your harvest. Therefore, you have to make sure that you have the perfect environment for it to grow healthy, and the patience too, so you will continue feeling motivated to see what your harvest will look like.

To germinate the seeds of the ghost peppers, you will need at least 35 days. Then from germination, you will need another 150 days, before the plant produces fruit.

So the first thing that you have to do is to plant your seeds. Make sure that your soil is nourished enough, and should be well draining as well. Water cannot sit inside your container, otherwise, your seeds will not produce sprouts.

Ghost peppers also like warm soil. Therefore, you have to make sure that your soil is at least 90 degrees F. You can do this by placing your garden bed on top of a heating plate.

When your sprouts are starting to show from the seeds, you might want to help it germinate more, by placing a CFL lighting. Continue moistening the soil. Moisten only, just so it will not dry. Do not overwater.

When your sprouts are at least a week old, you can start exposing them under the sun. That way, the sprouts will already be accustomed to the new environment, in preparation for their transplantation.

Start transplanting your ghost peppers in the ground when they are at least 6 inches tall. Make sure to plant them deep enough so that the roots will continue growing. Make sure that each plant is at least 24 inches away from each other. They need that amount of space to grow their roots, for proper air circulation, and for them to grow freely.

Water your newly transplanted ghost peppers. Wait for it to grow fruits, and wait for the actual fruits to change its color, before you go ahead and harvest it.

By the way, if you want to boost pollination in your chili garden, it might help if you plant different varieties of hot peppers beside your ghost peppers. A good choice would be habenaros and bhut.

These are the different steps, if you want to grow ghost peppers.

Image courtesy of Greenhouse17/flickr

How to Grow Eggplant

If you are new to vegetable growing, then growing eggplants might be the best that you can start with. Eggplants are really nice to look at both in the garden and on the table. It comes in a wide scale of variety, which is why you can see eggplants in different shapes, sizes, and colors.

Eggplants are also very easy to grow. This is probably one of the reasons why newbies in vegetable growing might want to startHow to Grow Eggplant with this particular vegetable. It requires less knowledge in gardening, and maintaining eggplants is also never a challenge.
Here are some of the tips that you might want to consider, if you want to plant eggplants:

Choosing The Area

Make sure that the area you are choosing for planting your eggplants will have long hours of sunshine. Eggplants love the warm weather, that is why. The soil should also be well draining, so that water will not sit at the bottom and damage the roots. The PH level of the soil should also be at least 5.8, and adding lime to the soil might also be best, because eggplants grow better in soil that is high in calcium.

Seeds Or Seedlings

The nice thing about eggplants is that you can start by either planting them starting from seedlings, which you can buy in most garden supply stores or nurseries, or you can also buy seeds from the same sources, or you can find them too from the garden section in your favorite grocery stores.

If you plan to start from scratch, you have to start planting your seeds indoors first. That way, you can manage the temperature easier, to make sure that your seeds will germinate well, and produce healthy sprouts fast.

Planting & Transferring

When your seeds have already sprouted, and the plant is about 1 to 2 inches tall already, you can now transfer it to your garden, where it will continue growing. However, if you live in cold areas, you have to make sure that the ground is already warm (preferably 60 degrees Fahrenheit), and frost is already out. Eggplants have a slim chance of survival in the cold, so this is something you want to consider closely.

If you bought seedlings instead of seeds, you also have to transfer it to the ground, at the same recommended time.

Make sure that the eggplants are 18 inches apart, so that their roots will have room to grow under. This will also give the actual branches of the plant to grow fuller, because eggplants tend to grow big and bushy.

Nurturing

Eggplants should be watered every week with at least an inch of water. That way, your eggplants will have enough nourishment from the moist soil.

Harvesting

You should know when the eggplants are ready for harvesting when they have already achieved a uniform color, and when they have grown to the right size already.

These are the different ways that you should try, if you want to grow eggplants.

Image courtesy of garlandcannon/flickr

How to Grow Cucumbers

Cucumbers are great to have inside the fridge, especially during this hot season. They are very refreshing and flavorful, which you can use for garden salads, soups, side dishes, and so much more! In fact, you can also use cucumbers to aid tired and puffy eyes.

The thing with cucumber that you buy from stores is that some do not have that sweet and very refreshing taste. Instead, they How to Grow Cucumbershave this intense bitter flavor, which is very hard to determine without cutting and tasting it. So to make sure that your cucumber will taste refreshingly sweet, you have to make sure that they are properly nourished while they are growing.
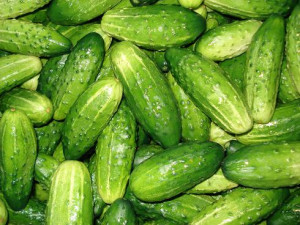
If you want to know how to properly grow cucumbers in your own garden, here are the steps that you have to do:

Cucumbers Love Water

The key to produce refreshing and flavorful cucumbers is to keep them hydrated. You have to water them regularly, to ensure that the soil is always moist. The amount of water needed will depend on the kind of soil that you have, and the weather as well. Remember, stressed cucumber plants often produce bitter cucumbers. Stress is often a result of plant dehydration.

Mulching

Mulching will also help your cucumber plant to grow healthy and produce fresh tasting cucumbers. Mulching can also prevent weeds to grow near the cucumber plants, which is great, because your plants will not share the nutrients coming from the soil. Mulching is often best to be done when it is already summer, or when the soil is completely warmed up.

Temperature

The thing with cucumbers is that they can be quite tricky to grow. They do love the heat of the sun, so they are best grown during the summer. However, cucumbers can also be very sensitive to heat. When the temperature is not managed properly, they will not produce good quality fruits, and they will not produce an ideal amount of harvest. Shading your cucumber plant is a good idea to control the temperature. You can either provide an artificial shade to control the amount of heat coming from the sun, or to plant higher plants beside it, to provide natural shade. Remove weeds that will share the nutrients of the soil too!

Harvest Cucumbers

When your cucumbers are starting to form, and you see that they are green all over, that is a good sign that they are ready for harvesting already. If you leave them for a long time in the vine, you will end up having hard and stiff cucumbers that is not ideal for eating anymore. Ideally, when you start harvesting the first batch, expect to harvest the next batches every 2 days.

Once the cucumbers are harvested, it would be best to keep them inside separate plastic bags so that it will keep its moisture inside.

These are the different ways that you can do, in order to grow fresh, sweet, and flavorful cucumbers that will freshen you up during a hot summer day.

image courtesy of Dorocia/flickr

How to Grow Corn

There are so many benefits that one can get from growing their own vegetables at home. It is great to be able to serve your family garden fresh fruits and vegetable. They are healthy, nutritious and taste great. In this article I’m going to show you how to grow corn.

Corn is one of the staple foods that we eat. We can have them in almost any time of the day, and corn is a great source of many How to Grow Cornvitamins, minerals, and fiber that is good for our body and health.
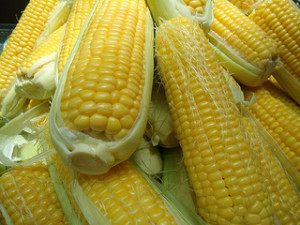
Corn can be grown at home with very minimal knowledge and skills. Below are the different ways that you can do, if you want to grow corn at home:

Choosing Your Corn

Know the type of variety of corn that you want to plant. This is because you have to know beforehand if the corn can live in the kind of climate that you have, as well as the PH level of your soil. Good thing that you can do several things to control the temperature where your corn is planted, you can also change the level of the soil’s PH, by just adding agents on the soil.

Most people intend to plant sweet corn, as this type of corn has the most use in most households. You can eat them on the cob, or you can also process them by canning them, to lengthen its shelf life. If you are planning to plant sweet corn, then you might want to check the different varieties of sweet corn that is determined by the level of sweetness that they have. You should check the following signs on the packet:

SU – semi sweet

SE – sugar enhanced

SH2 – super sweet corn

Planting Your Corn

Ideally, the best time to plant corn is when the soil is warm. If the soil is cool or cold, you will end up having rotten seeds. You should also choose an area where the corn will receive full sunlight for quite a number of hours during the day. You might also want to remove the weeds in that area regularly, as corns will have a difficult time growing when they share the nutrients of the soil with the weeds.

Experienced farmers know to plan their crops. Normally, they plant corn after the harvested peas or beans. This is because peas and beans leave a good amount of nitrogen in the soil, which corn plants love. But this does not mean that you have to plant beans before corn. What I am just saying is that you might want to enrich your soil with nitrogen, in order to give the needed nutrients of your corn plant.

Harvesting Corn

When your corn is about 12 inches at the very least, this already means that it is ready for harvesting. Another indication if the corn is already ready for harvesting is if has already developed silky strands of brown hair. Twist the corn and pull them when harvesting.

image courtesy of Meg Stewart/flickr

Tips for Washing Produce

Fruits and vegetables are an important part of a healthy diet. So, how do we go about keeping our fresh produce safe to eat?

Here are some simple tips for washing produce:Tips for Washing Produce

  • Use a clean pair of scissors or knife to open your bags of produce
  • Fruit and vegetable peels may carry bacteria that can spread during peeling, cutting, or eating. Wash all your fresh fruits and vegetables with cold tap water immediately before eating. This applies to all fruits and vegetables like bananas and oranges; even your pre-washed fruits and vegetables.
  • Scrub your firm fruits and vegetables with a produce brush or produce rag to clean them.
  • Remove and discard the outer leaves on lettuce.
  • After washing place your produce into a clean container, not back into the original bag.

These are just a few tips for washing produce that will keep all your fruits and veggies safe to eat.

image courtesy of muammerokumus/flickr

How to Grow Cilantro

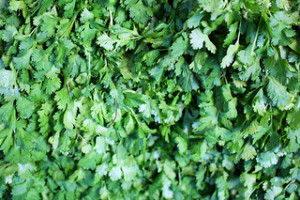
If you are fond of Mexican or even Asian dishes, then you might want to know how to grow a garden full of cilantro, so you can be sure to have fresh and crisp cilantro every time you need it. Cilantro are not just very flavorful. It is also packed with so much vitamins and minerals that is good for your body and health.

The thing with cilantro is that they can rot easily even if you store them inside the refrigerator. Therefore, having them plantedHow to Grow Cilantro in a pot will be the best way to go, if you want to ensure freshness and flavor in every dish that you will be using it with.

Here are the steps for growing cilantro:

 Get The Seeds

You need good quality seeds if you want to grow healthy and abundant cilantro. You can purchase seeds online, farmer’s market, or from garden supply stores. When you already have them, wash them with soap and water. Make sure that you thoroughly rinsed the seeds. Once they are dry, you can now plant them. Make sure that the soil is well draining, and you have to place the pot anywhere where there is full sunlight.

 Planting The Seeds

Cilantro can grow tall, so you might want to set at least 1 inch in between seeds. Make sure that the seeds are planted not more than 1 inch deep. This depth is enough for cilantro to develop strong roots. Cilantro cannot live in the frost. So if you live in cold areas, you might want to plant them indoors, but make sure that sunlight reaches your plant box.

 Trimming & Pruning Your Cilantro Plant

Trim the leaves when they are already branching out far from the central stalk. This is because you want to conserve the energy of the plant, so that it will continue developing leaves. Cutting the leaves and flowers of the cilantro plant will also give you a good harvest of seeds that you can replant, in order to make new sprouts of cilantro. Pruning your cilantro plant will help you lengthen the time you have for harvesting fresh and crisp cilantro leaves.

 Harvesting

When harvesting cilantro, make sure to cut leaves from different spots. This is to make sure that no parts will be dull, so that every part of your cilantro plant will continuously develop new leaves that you will use for cooking.

These are the different steps that you can do if you want to know how to grow cilantro. The steps above are actually basic. You can still learn more on how to maximize your harvest by gathering seeds from dead flowers, so you can make your cilantro garden bigger and bountiful. It is important to know how to harvest seeds from your existing cilantro plant. This is because no matter how you take care of your cilantro plant, this short lived plant will eventually die.

image courtesy of LeafLanguages/flickr

How to Grow Carrots in Pots

Carrots are very versatile. This is because you can enjoy them cooked or even raw. Carrots can make delicious cooked dishes. It can also be a nice snack that you can munch on, which is actually better than chips. Carrots are high in vitamins and minerals that will promote good health. So if you want to make sure that you will always have fresh and crisp carrots at home, here are the ways that you can do, in order to grow them at home.

The nice thing about carrots is that you do not always need to have a large lawn or garden to grow them. If you have deep pots How to Grow Carrots in Potsat home, you can already use that to plant carrots.

Here are the ways on how to grow carrots at home in pots:

Choose Your Carrots

Since you are growing carrots in pots, it means that you might want to choose a variety that does not grow too much. Check this type of variety from a local nursery or from an online retailer of vegetable seeds.

Choosing Your Container

You can buy containers from garden supply stores that is deep enough to hold carrots, and has holes, so that it will drain the excess water. When you have already chosen your container, clean them and make sure it is free from any bacteria from dust or from a previous soil (in case you have already used this container already).

Preparing The Soil

Make sure that your soil is loose. This will help the roots grow as far as it can. You must also mix your garden soil wit compost or perlite to make sure that your soil will have enough nutrients to produce healthy carrots.

Pour the soil into your container, but leave at least an inch of empty space above. Create tiny holes, big enough to fit the seeds of the carrots. Make sure that the holes are at least 3 inches apart.

 Nurturing

Water your carrots daily to ensure that the soil is moistened. Make sure that excess water will drain, because if the water sits inside the container, it will stop the carrots from growing, and possibly kill them as well. Once your carrots are starting to grow, there is a tendency for the top to be exposed. If this happens, make sure to cover it with more garden soil. Because if not, the top part will be stiff and become inedible.

Harvesting Carrots

Normally, you can harvest carrots two months after you have planted them. But this will still depend on the type of carrot that you planted. You might want to check on the packet for this. But as a general rule, if you want your carrots to be sweet to the bite, then you might want to harvest them at the earliest time possible.

These are the different ways that you can do, if you want to grow carrots at home, inside individual pots for your own consumption.

image courtesy of Betari Ratih