Container Gardening Ideas for Small Spaces

Why Choose Container Gardening for Small Spaces?

Container gardening has gained immense popularity in recent years, and for a good reason. It offers several advantages, particularly when dealing with limited space:

container garden ideas

Flexibility: Containers can be placed virtually anywhere – on a balcony, patio, deck, window ledge, or even inside your home. This flexibility makes it an ideal choice for small spaces.

Easy Maintenance: Containers are more accessible to tend to than traditional gardens, requiring less bending and reaching. This accessibility makes gardening easier for individuals with mobility issues.

No Yard Required: Container gardening doesn’t require a yard or a dedicated outdoor space. It’s perfect for apartment dwellers, renters, or anyone without access to traditional garden beds.

Design Possibilities: Containers come in various shapes, sizes, and materials, allowing for creative and customizable designs that suit your style and space.

Protection from Pests: Elevated containers can offer some protection from ground-dwelling pests, making it easier to control and prevent infestations.

Getting Started with Container Gardening

Before delving into container gardening ideas, let’s cover the basics to ensure your success in creating a thriving small-space garden:

Choose the Right Containers: Select containers that match your space and design preferences. Consider materials like terracotta, plastic, wood, or fabric. Ensure that containers have proper drainage holes to prevent overwatering.

Select the Right Potting Mix: Use a high-quality potting mix tailored to the types of plants you intend to grow. A well-draining mix with organic matter is usually the best choice.

Consider Your Space and Lighting: Assess the available space and the amount of sunlight it receives. Different plants have different light requirements, so choose varieties that suit your conditions.

Water Wisely: Container plants may need more frequent watering than traditional gardens, as containers can dry out quickly. Monitor soil moisture and water when the top inch of soil feels dry.

Fertilize Appropriately: Use a balanced, slow-release fertilizer or liquid fertilizer as needed to provide essential nutrients to your plants.

Container Gardening Ideas for Small Spaces

Now, let’s explore various container gardening ideas that you can adapt to your small space:

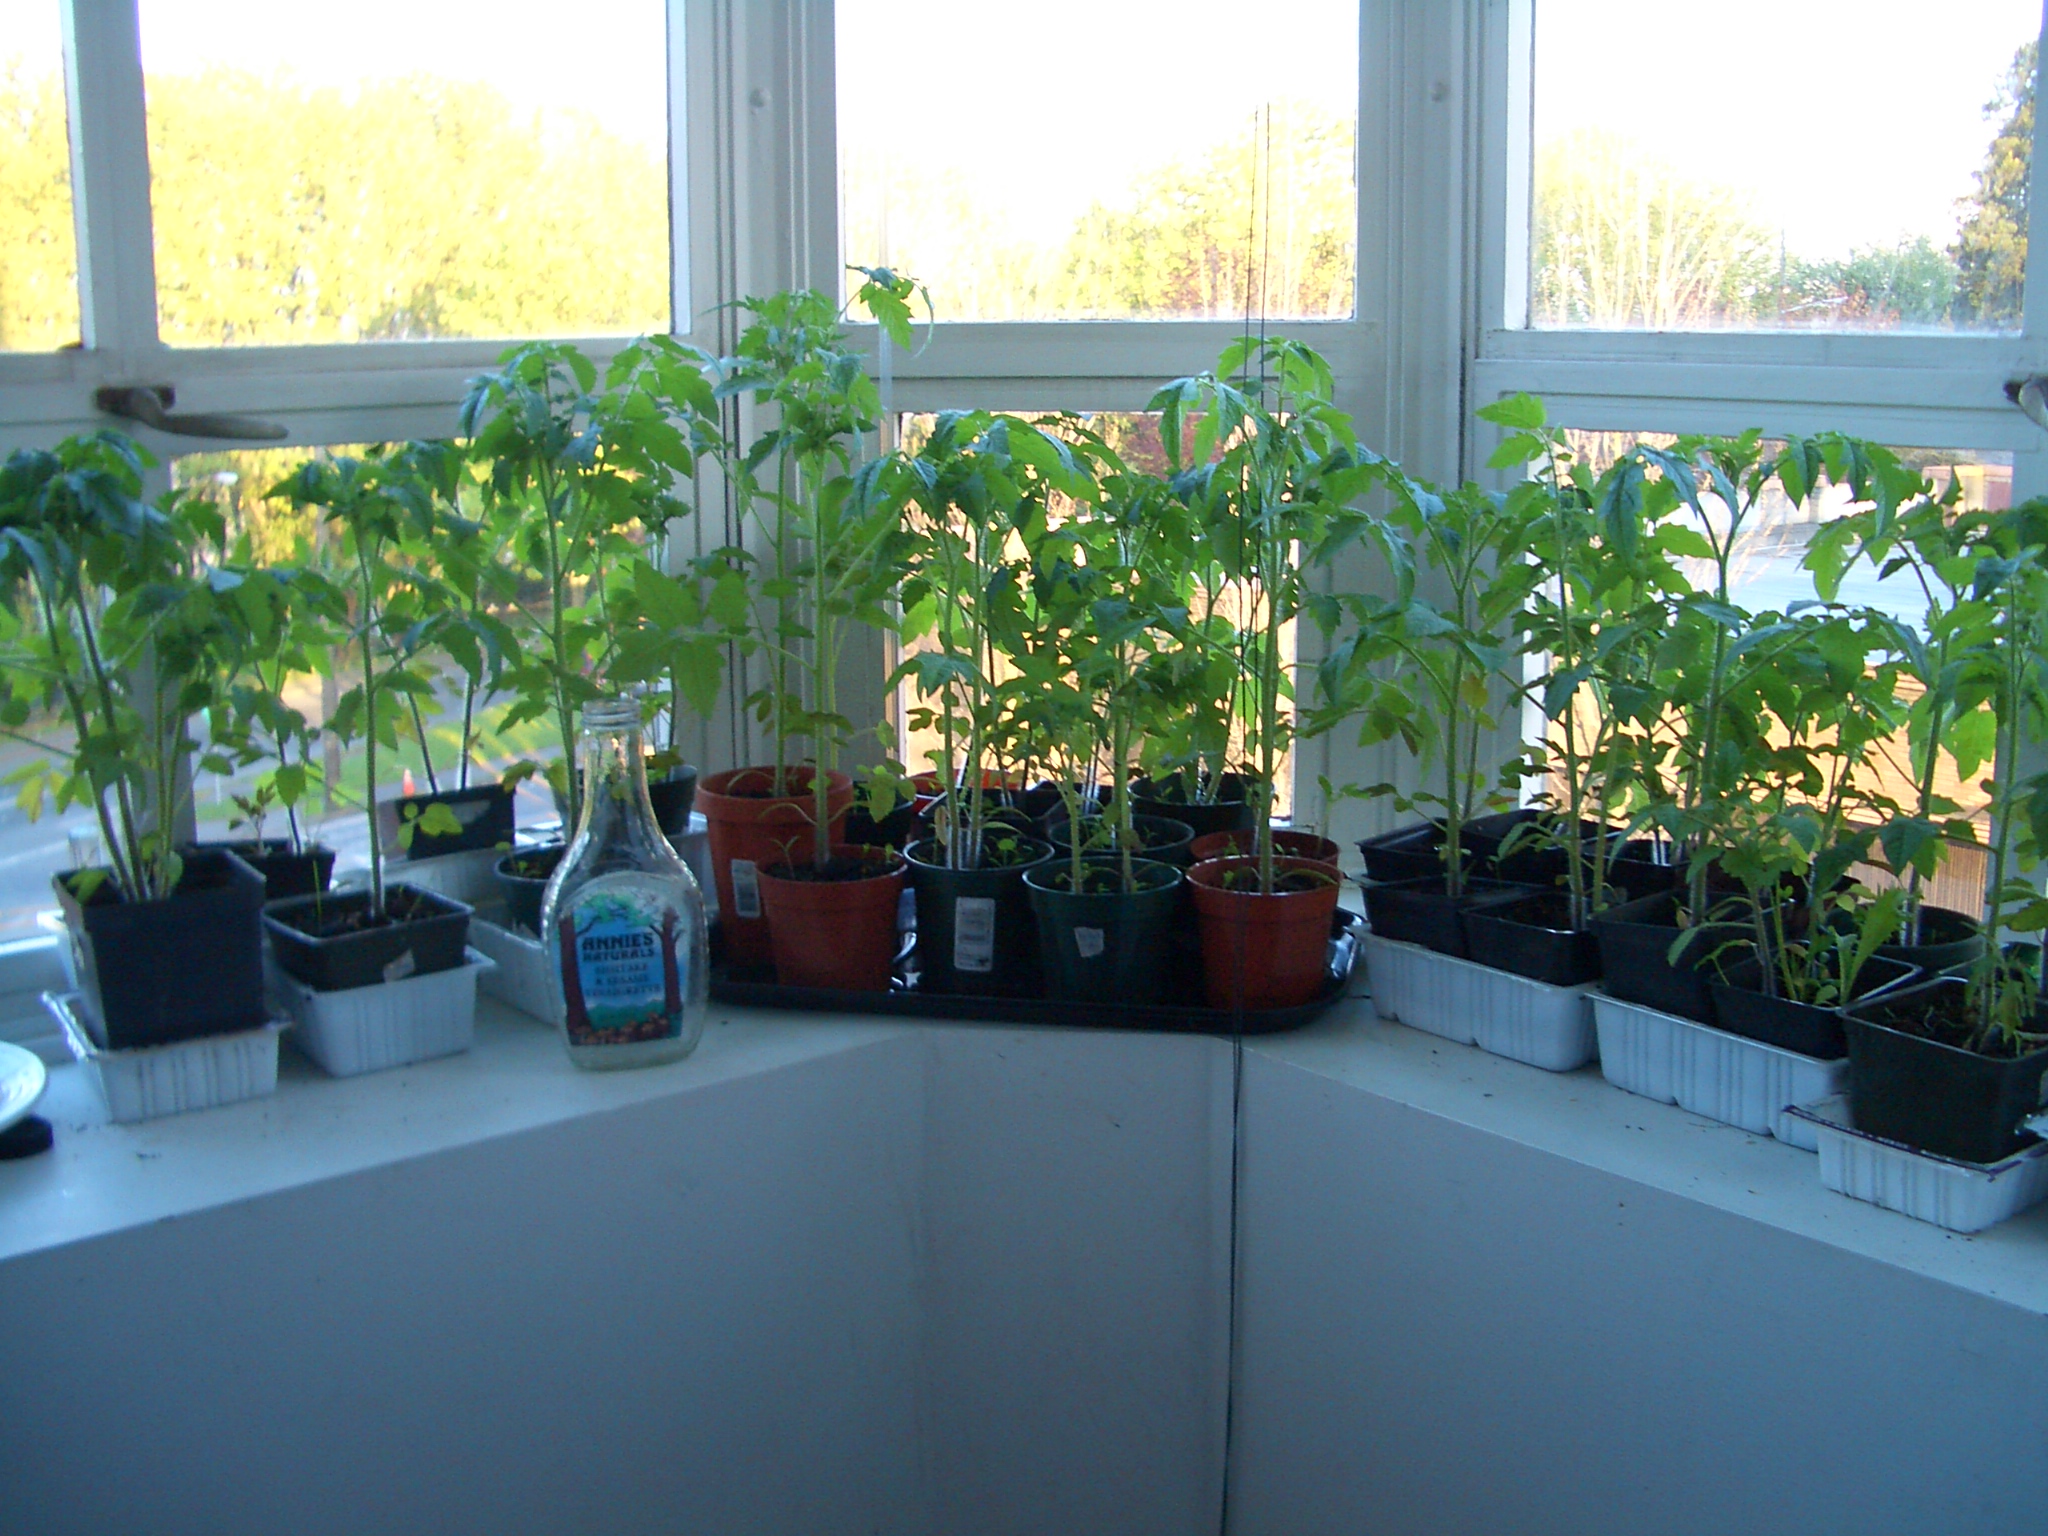
Herb Garden on a Windowsill

  • Utilize your windowsill to grow a culinary herb garden. Plant basil, rosemary, thyme, and mint in individual containers.
  • These fresh herbs are perfect for enhancing your cooking and adding fragrance to your space.

Vertical Vegetable Garden

  • Maximize vertical space with a trellis or wall-mounted garden system.
  • Plant climbing vegetables like cucumbers, beans, or cherry tomatoes to save space while enjoying a bountiful harvest.

Hanging Baskets

  • Hang colorful flowering plants or trailing vines from hooks or balcony railings.
  • Options include petunias, fuchsias, or cascading nasturtiums for a vibrant display.

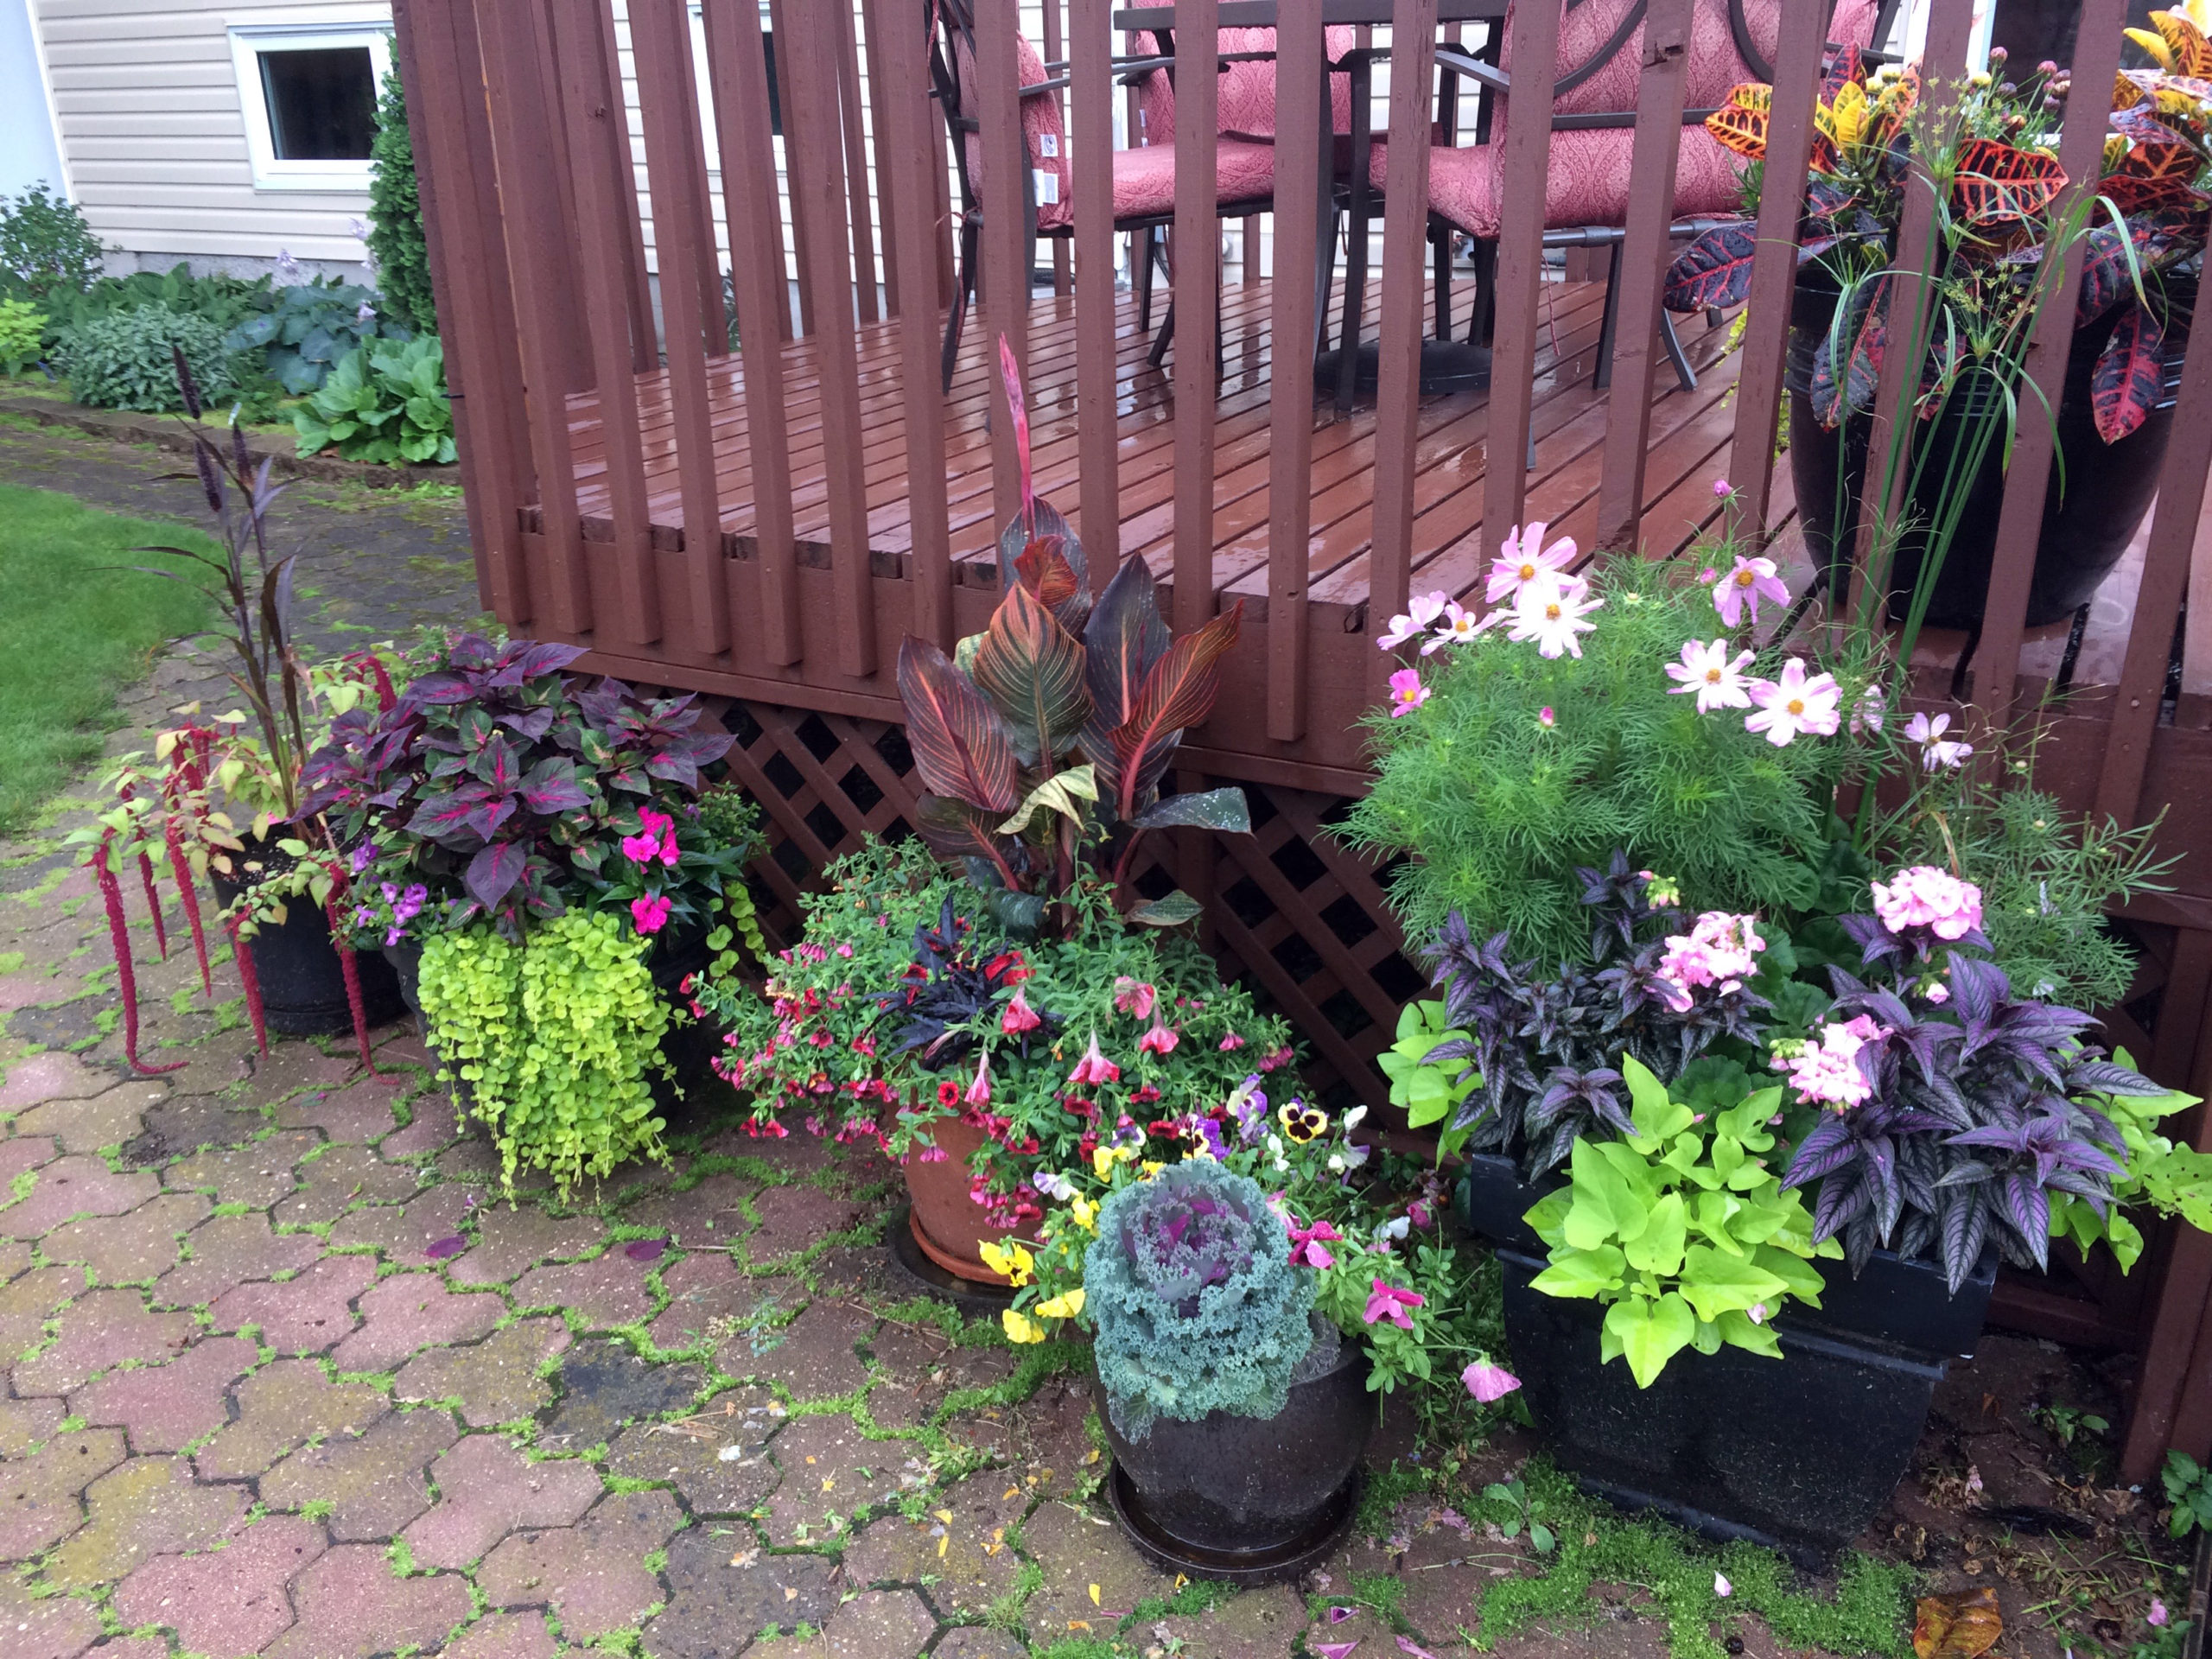
Tiered Container Garden

  • Arrange containers on a tiered plant stand or shelving unit to create an attractive display.
  • Combine different plant heights and colors for a visually appealing garden.

Succulent Paradise

  • Succulents thrive in containers and require minimal care.
  • Create a succulent garden with various textures and colors, perfect for a small tabletop or window display.

Compact Patio Fruit Trees

  • Dwarf fruit trees, such as patio peach or lemon, can be grown in containers.
  • Enjoy homegrown fruit, even in limited spaces, with proper care and pruning.

Miniature Fairy Garden

  • Create a whimsical fairy garden in a shallow container.
  • Decorate with miniature figurines, tiny plants, and tiny accessories for a magical atmosphere.
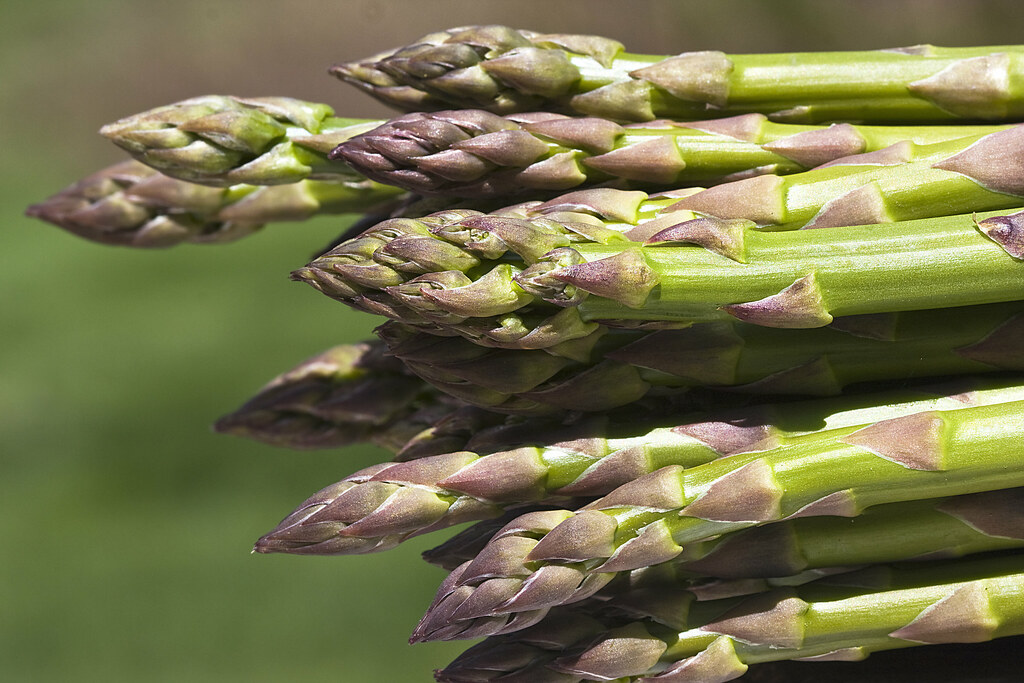
Balcony Salad Bar

  • Plant salad greens, cherry tomatoes, and edible flowers in containers.
  • Enjoy fresh salads straight from your balcony garden.

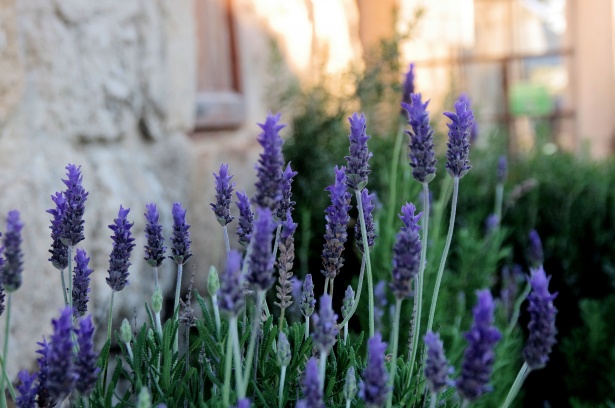
Aromatic Lavender Wall

  • Plant lavender varieties in tall, narrow containers against a wall or fence.
  • Enjoy the soothing scent and attract pollinators to your small garden.

Terrarium Garden

  • Build a glass terrarium with small succulents, air plants, and decorative stones.
  • These self-contained ecosystems are easy to care for and make stunning indoor displays.

Conclusion

Container gardening is a versatile and accessible way to bring the joys of gardening into even the smallest of spaces. With the right containers, potting mix, and plant selections, you can transform your balcony, patio, or windowsill into a lush, green oasis. Whether you’re a seasoned gardener or a novice, these container gardening ideas for small spaces provide an opportunity to cultivate your own slice of nature, no matter where you call home. Get started today and experience the beauty and serenity of container gardening in your compact space.

Best Low Maintenance Outdoor Plants

Why Choose Low Maintenance Outdoor Plants?

Low maintenance plants are perfect for busy individuals, beginners, or anyone who prefers a garden that thrives with minimal attention. These plants are not only easy to care for but also resilient, making them a great choice for various climates and conditions. Here are some compelling reasons to consider low-maintenance outdoor plants:

low maintenance plants

Time-Saving: Low-maintenance plants require little to no pruning, deadheading, or constant attention. This means you can spend less time on garden upkeep and more time enjoying your outdoor space.

Drought Tolerance: Many low-maintenance plants are drought-tolerant, making them ideal for regions with water restrictions or sporadic rainfall.

Pest and Disease Resistance: These plants are often less susceptible to common pests and diseases, reducing the need for chemical treatments.

Beginner-Friendly: If you’re new to gardening, low-maintenance plants are an excellent starting point. They provide a forgiving learning curve while still delivering beautiful results.

Year-Round Interest: Low-maintenance doesn’t mean boring. Many of these plants offer year-round interest with their foliage, blooms, or berries.

Top Low Maintenance Outdoor Plants

Now that we understand the benefits, let’s delve into some of the best low-maintenance outdoor plants to consider for your garden:

Lavender (Lavandula spp.)

  • Lavender is a fragrant, drought-tolerant herb known for its stunning purple blooms.
  • It requires well-drained soil and full sun, making it an excellent choice for arid climates.
  • Pruning spent flowers can prolong the blooming period, but it’s not necessary for plant health.

Sedum (Sedum spp.)

  • Also known as stonecrop, sedum is a hardy succulent that thrives in dry conditions.
  • It comes in various colors and shapes, adding texture to your garden.
  • Sedum requires little water and can withstand poor soil.

Yarrow (Achillea spp.)

  • Yarrow is a drought-tolerant perennial with feathery foliage and flat-topped flower clusters.
  • It attracts pollinators and is resistant to deer and rabbits.
  • Yarrow can thrive in poor, rocky soil.

Russian Sage (Perovskia atriplicifolia)

  • Russian sage is a woody perennial with silvery-gray foliage and spiky lavender-blue flowers.
  • It’s heat and drought-resistant and requires minimal care.
  • Prune back in spring to encourage new growth.

Ornamental Grasses (Various Species)

  • Ornamental grasses, like miscanthus and feather reed grass, provide year-round interest with their graceful plumes.
  • They’re extremely low maintenance, requiring occasional trimming to remove dead growth.
  • Ornamental grasses are versatile and add movement to your garden.

Coneflowers (Echinacea spp.)

  • Coneflowers are native perennials with daisy-like blooms in various colors.
  • They attract pollinators and are drought-resistant.
  • Deadheading spent flowers can encourage prolonged blooming.

Daylilies (Hemerocallis spp.)

  • Daylilies are hardy perennials with colorful, trumpet-shaped flowers.
  • They require little care and are available in various heights and colors.
  • Remove spent blooms to promote continuous flowering.

Barberry (Berberis spp.)

  • Barberry shrubs are known for their vibrant foliage, which comes in shades of red, orange, or gold.
  • They’re drought-tolerant and can thrive in various soil types.
  • Prune as needed to maintain shape and size.

Japanese Spurge (Pachysandra terminalis)

  • Japanese spurge is an evergreen ground cover plant with glossy green leaves.
  • It’s highly shade-tolerant and can form dense carpets under trees.
  • Minimal maintenance involves occasional weeding and thinning.

Autumn Joy Sedum (Hylotelephium ‘Herbstfreude’)

  • Autumn Joy sedum is a popular variety known for its late-summer to fall blooms that start pink and turn rusty red.
  • It’s drought-tolerant and attracts pollinators.
  • Prune back in early spring to encourage new growth.

Conclusion

Creating a beautiful, low-maintenance garden doesn’t mean sacrificing aesthetics. With the right selection of plants, you can enjoy a thriving garden with minimal effort. Whether you have a busy schedule, are new to gardening, or simply prefer a low-key approach to landscaping, the best low-maintenance outdoor plants offer a perfect solution. So, roll up your sleeves, start planting, and watch your garden flourish with ease and style.

Indoor Vegetable Gardening for Beginners: A Green Thumb's Guide

Gardening has always been associated with outdoor spaces, but what if you don’t have a garden or outdoor area? The answer lies in indoor vegetable gardening, a rewarding and sustainable way to grow your own produce right inside your home. This article is your comprehensive guide to indoor vegetable gardening for beginners, providing all the essential information to get you started on your journey to becoming an indoor gardening enthusiast.

indoor vegetable gardens

Why Choose Indoor Vegetable Gardening?

Indoor vegetable gardening offers several advantages that make it an attractive option for beginners and experienced gardeners alike:

Year-Round Gardening: Unlike outdoor gardening, indoor gardening allows you to grow vegetables throughout the year, regardless of the season.

Control Over Environment: You have complete control over the indoor environment, including light, temperature, and humidity, which can lead to healthier plants and higher yields.

Fresh and Organic Produce: Homegrown vegetables are not only fresh but also free from pesticides and chemicals, ensuring the highest quality and taste.

Getting Started

Selecting the Right Location: The first step is to choose an appropriate location for your indoor garden. Look for a spot with plenty of natural light, such as a sunny windowsill or a room with good sunlight exposure.

Choosing Containers: Container selection is crucial. Opt for containers that are the right size for your chosen vegetables and have drainage holes to prevent overwatering.

Soil and Potting Mix: Use a high-quality potting mix that provides proper drainage and aeration. You can also create a custom soil mix suitable for the vegetables you plan to grow.

Selecting Vegetables: As a beginner, it’s best to start with easy-to-grow vegetables like herbs (e.g., basil, mint), leafy greens (e.g., lettuce, spinach), and compact varieties of tomatoes and peppers.

Watering: Proper watering is essential. Ensure that your containers have drainage holes and water your plants when the top inch of soil feels dry. Avoid overwatering, as it can lead to root rot.

Lighting Requirements

Natural Light: If possible, place your indoor garden in a sunny window where your plants can receive at least 6-8 hours of direct sunlight daily.

Artificial Light: In spaces with limited natural light, consider using grow lights. LED or fluorescent grow lights are energy-efficient and can mimic natural sunlight.

Light Duration: Most vegetables require 12-16 hours of light per day. Use a timer to regulate the light cycle for your indoor garden.

Temperature and Humidity

Temperature: Most vegetables thrive at temperatures between 60°F and 75°F (15°C to 24°C). Avoid placing your plants near drafts or heating vents.

Humidity: Indoor environments can be dry. Increase humidity levels by misting your plants or using a humidity tray with water.

Maintenance and Care

Fertilization: Indoor plants need regular feeding. Use a balanced, water-soluble fertilizer every 2-4 weeks during the growing season.

Pruning and Thinning: Regularly prune your plants to encourage bushier growth and remove dead or yellowing leaves. Thin seedlings to prevent overcrowding.

Pest and Disease Management: Keep an eye out for common indoor garden pests like aphids and spider mites. Address any issues promptly with natural remedies or insecticidal soap.

Harvesting

The joy of indoor vegetable gardening culminates in the harvest. Depending on the type of vegetable you’ve grown, harvesting times vary. Here are some general guidelines:

Leafy Greens: Harvest when the leaves are mature, usually within 4-6 weeks.

Herbs: Harvest as needed, but avoid removing more than one-third of the plant at once.

Tomatoes and Peppers: Harvest when fruits are ripe and have reached the desired size and color.

Conclusion

Indoor vegetable gardening is an excellent way for beginners to experience the joys of gardening without the need for outdoor space. With proper planning, care, and attention to detail, you can enjoy a year-round supply of fresh, homegrown vegetables. So, roll up your sleeves, gather your gardening tools, and get ready to embark on your indoor vegetable gardening adventure. Happy growing!

How to Grow Wine Cap Mushrooms at Home

Do you want to try to grow mushrooms in your home garden? Well, Wine Cap mushrooms are one of the easiest. I put spawn out in the spring last year, but unfortunately it got extremely hot and dry right after that I didn’t get any. But this spring they popped up. I got lot of Wine Cap mushrooms.

Wine Cap mushrooms are call King Stopharia, or Garden Giants, because they get so big. I got some really big ones. I love sauteing them and adding them to omelets. They are really easy to grow. They are pretty much hands off compared to growing other mushrooms

Check out the video below from Field & Forest on the easy method for how to grow wine cap mushrooms at home in your garden. It’s simple. I got my mushroom spawn from them too.

I hope that video helped out with how to grow these Garden Giants at home. I eat a lot of mushrooms, so it’s perfect. They also help build soil. So, you really can’t beat it. Give Wine Cap mushroom growing a try, I’m sure you will enjoy it like I have.

Can You Grow an Apple Tree from Store Bought Apples?

Apples are one of my favorite fruits. I love being able to pick them right from the tree. There is nothing better than a fresh apple picked from your very own apple tree.

Maybe you’ve wondered while eating an apple from the store if you could just plant the seeds and grow an apple tree? The answer is yes, you can grow an apple tree from the seeds of a store bought apple. However, you might not get the apple you were expecting if you do that.

To learn more check out this video on growing apples from seeds. It should answer all your questions.

I hope that was helpful. Growing apple trees are great. Our family loves fresh picked apples, there are so many things you can make with them as well. Hopefully this has gotten you excited and on the road to growing your very own apple tree from seed.

Can You Grow Asparagus in a 5 Gallon Container?

Asparagus is one of my favorite spring vegetables. It is a reliable perennial that comes up year after year, so lots of people love to grow it. However, if you do not have the room for a typical garden bed, have poor soil, are just love container gardening, you may wonder if you can grow it in containers.

So, can you grow asparagus in a 5 gallon bucket? Yes you can, but I’m afraid it is far from ideal to do so, and your asparagus will probably not live long.

Asparagus as I mentioned before is a perennial, so it comes back year after year. It grows fast and has a large root system that makes it hard to grow in a 5 gallon bucket or a container. Over wintering is another concern, along with it getting enough nutrients.

I’m not trying to discourage you from trying, gardening is fun and so is experimenting. So if you really want to give it a go, I highly suggest you watch the following video on growing asparagus in containers. You will want the largest container you can find, so a 5 gallon bucket might not be ideal.

So, I hope that video was helpful in explaining what it takes to grow asparagus in containers. Maybe with that advice you could try it with a 5 gallon bucket as well. If you are looking for a container to grow your asparagus Here are Some to Check Out

Best Tips on How to Grow Sweet Potatoes

growing sweet potatoes at home

Spring is the best time to grow sweet potatoes either by growing them starting from slips or from scratch. But if you want to do it the easy way, growing sweet potatoes from slips is the best way to go. Sweet potatoes are one of the best tasting potatoes that you can enjoy mashed, boiled, fried, or even added to a savory dish that you and your family can enjoy.

The nice thing about sweet potatoes is that they grow easily, and requires minimal care. You can also expect a large batch of harvest, which is great to share with family and friends.

To grow sweet potatoes, here are the steps that you should do:

Step 1: Choose Your Sweet Potato

We have already mentioned that growing sweet potatoes can start from slips. Slips are the small outgrowths that can be found in the plant. You can use the slips to make new sweet potatoes. Slips can be purchased from online retailers or from garden supply stores. But if you have the time and experience, you can also grow your own slips.

Step 2: Cut Your Sweet Potatoes

If you want to do it from scratch, cut two sweet potatoes in halves and wash them. Make sure that these potatoes are untreated, fresh, and healthy, in order to yield the same for your harvest.

Step 3: Place Your Sweet Potatoes In The Jar

Get a clean jar with an opening that will fit your potato. Fill it with water. Skew the potato with sticks and allow it to hung from the opening, living half of the potato submerged in water, while the other half is exposed in air.

Step 4: Sweet Potato Slips

After a few days or weeks, you will notice the slips growing from the potato already. Snip the slips and plant it to make new sweet potatoes.

Step 5: Grow The Roots Of Your Sweet Potato Slips

To prepare your slips for planting, you must first grow the roots. You can do this by submerging the slips inside a jar full of water.

Step 6: Plant Your Sweet Potato Slips

Now that your slips have roots, it is now ready for planting. Choose your garden bed. The garden bed should be in a place where there is direct sunlight always. This is because sweet potatoes love the warm weather. Sweet potatoes grow under the ground so you do not have to do anything, aside from watering it, after planting the slips. Just make sure to at least plant the slips 6 inches deep, where the half part of the plant is submerged in soil. Also, since sweet potatoes grow underground, you might want to make sure that the soil is a bit loose, to allow easy tilting under.

These are the different ways that you have to do, if you want to grow sweet potatoes. Sweet potatoes are easy to manage, easy to plant, and yields a good amount of harvest that will surely delight you.