How to Grow Broccoli

Many are finding the right guide on how to grow broccoli, so that they can always benefit from a fresh and healthy harvest that will not only make delicious meals, but will also help them keep their health at tip top condition.

According to medical researchers, broccoli is high in vitamins and essential nutrients, including a cancer fighting agent calledHow to Grow Broccolisulforaphane. This is probably the reason why broccoli are currently one of the most popular veggies that people will always remember buying when they are out for a grocery shopping.

If you want to grow broccoli, here are the steps that you have to do:


  1. Plan where you want to plant your broccoli – broccoli grows as tall as 3 feet. Therefore, if you are fond of planting vegetables, and you plan to plant it near something else, make sure that the broccoli will not shade the nearby plants. The soil should also be well draining, and the area where you want to plant broccoli should have enough sunlight and shading.
  2. Soil PH – If you want to grow abundant and quality broccoli, you have to maintain the soil’s PH to at least 7. You can do this by adding compost or manure to your soil.
  3. Seeding – if you live in warmer areas, you have to plant the seeds at least early in spring. If you live in cooler areas, you have to do it at least two months before the last frost.
  4. Add more compost and manure – when your plant is starting to grow, at least half inch, add compost to the soil. Doing this will add more nutrients to the soil, which your broccoli plant will need for proper nutrition.
  5. Hydrating the plant – ideally, your broccoli plant will need 2 inches of water at the most every single week. The amount of water needed and the number of times you will need to water it will depend on the climate in your area.
  6. Mulching & Protecting the plant – to maintain proper soil moisture, mulch the area. Mulching will also prevent weeds to come near and share the nutrients of the soil. Place paper collars around each crown in order to protect the actual broccoli from insects and prey such as cutworms.
  7. Harvesting – the way to know if a broccoli is ready for harvest is to look at the size of it and the color. Ideally, the color should be green overall. Do not wait for it to turn yellow. If you think that it has reached the right size already (similar to what you see from the grocery stores), then this is the best time to harvest them already.

These are the different steps that you have to make, if you want to grow broccoli. This dark green vegetable is a member of the brassica crop. This particular group of vegetables is well known to fight a lot of illnesses and diseases, including a very life threatening disease called cancer.


How to Grow Blueberries

Blueberries are one of the best sources of vitamins and essential nutrients that your body needs, in order to keep our health in tiptop condition. It is also high in anti-oxidants, that makes us look younger for a long time, and prevents illnesses and diseases too. I can go ahead and enumerate the number of benefits of blueberries to the body, but just to cut it short, blueberries are good for the body, so eating it will always be best for you.

If you are planning on including blueberries into your diet, then you might want to know the ways on how to grow blueberries, How to Grow Blueberriesso that you will always be sure of having fresh blueberries any time you need it.

Here are the steps on how to grow blueberries:

 Choosing Your Blueberries

Just like other fruits, blueberries come in different varieties. You have to choose the right variety that will suit your climate and the way you want to use it after harvest. For instance, there are blueberries that are best for eating raw and fresh because they are big and juicy. While some are best for toppings like blueberries on pancakes, waffles, or even on ice cream. These are the smaller ones.

 Preparing To Plant

The preparations that you have to do initially will always depend on the type of blueberry that you want to plant. There are some types of blueberries that require a large space, for them to grow healthy, so it can produce a bountiful harvest. You might also want to make sure that the area where you want to plant your blueberry has enough sunlight. The soil should also be well draining, which means it can absorb water, but it should not let the water sit for a long time.

Also, blueberries are very particular when it comes to the PH of your soil. They prefer it to be more on the acidic side, so you might want to make sure that your soil has a PH of at least 4.09. If you go beyond 5 PH, this will not do good for your blueberry plants.

 Promote Pollination

The flowers of a blueberry plant have male and female organs. However, you cannot be certain which among them can pollinate. To make sure that your blueberry plants will be able to pollinate, you must plant several varieties of it (still following the required space in between plants), so that the bees will be able to travel from one plant to another, and encourage pollination.

 Pruning

When you are starting to grow bushes already, make sure to prune some branches. Doing this will eliminate branches that are stagnant, and allow the nutrients to go to the other healthy branches that will produce fruits.

 Harvesting Blueberries

Harvesting blueberries can take some time. The actual waiting time will depend on so many factors including the type of blueberry that you planted, the climate, and of course the way you take care of your blueberry plants.

image courtesy of cagrimmett/flickr

How to Grow Blackberries Indoors

Fruit bearing trees are ideally planted outdoors in order to achieve success and better harvest. But this does not mean that you cannot plant them indoors, or in places where there is limited exposure to sun and outside weather.

With this, can you grow blackberries indoors? The answer is a big – YES! Blackberries are great source of vitamins, minerals, How to Grow Blackberries Indoorsand antioxidants. They make healthy snacks, juices, and shakes too!

So if you have limited garden space, or if you live in an apartment, this should not deter you from growing blackberries indoors. You can, if you will try hard.

Follow the steps below in order to achieve good results from your blackberry indoor planting project:

Blackberries do come in different variants. But if you are growing them indoors where there is very limited space, you might want to get the erect dwarf type of blackberries. This type of blackberry have very strong roots and stiff trunk. This will hold up any pressure and condition in an indoor environment.

Any container will do when planting blackberries indoors. You can use the ones made of clay, metal, or even plastic. Just keep in mind that you are likely to move your tree once in a while indoors maybe to give it some fresh air or sunshine outside. Thinking of the weight of your tree, soil, and container, you have to make sure to add caster stand at the bottom of your container, so that you will be able to move it with ease.

Before putting soil into your container, make sure that the container has holes. That will help drain the water well. You might also want to place wire mesh in every hole that your container has, so that it will not spill the soil. You can also place pieces of broken bricks underneath so that it can control the water from being drained too much.

Once you are done preparing your container, you should now prepare your soil. You need soil that is specifically formulated trees bearing fruits. You should be able to find them in garden supply stores and greenhouses. But just in case you cannot find one around, you can also make it by mixing vermiculate, sand, and peat. All one part each.

Now that you have your container and soil ready, you can now transfer your blackberry seedlings. But before transferring, check the canes around to see if there are unwanted and unhealthy looking roots. Remove them, and plant your blackberry plant at least 5 inches deep.

While your tree is growing, you might also want to nourish your tree with some compost, bone meal, or mulch. These will help your tree get more nutrients to make sure it grows appropriately and as expected.

Harvest time happens on the second year (blackberries need 1 year to mature). It might take a while before you can taste the first harvest. But the long wait is definitely worth it, once you have seen your tree bearing fruits successfully.

image courtesy of stanzebla/flickr

How to Grow Beans

The nice thing about growing beans is that they are very easy to grow and very easy to manage. You can also plant different varieties of them all at the same time, as they all need the same level of nurturing and environment. Beans are normally classified into three different types; dry, shelled ones, and the snap beans.

If you have a vegetable garden, you might always want to include beans into the variety of your veggies, as beans are high inHow to Grow Beans protein and a lot of vitamins that will help you achieve a leaner and healthy body.
To start growing beans, here are the steps that you have to do:


  1. Choosing the area – it is important to choose your area wisely, because you have to make sure that the area where you will planting your beans will have at least 5.5 for the soil’s PH. Furthermore, the area should also receive a lot of sun, in order for the beans to grow healthier and with vigor.
  2. Enrich your soil – it is always recommended for you to mix your soil with potassium and phosphorus. You can omit nitrogen, because beans can source nitrogen from air.
  3. Planting the seeds – when the soil has already reached at least 55 Degrees F, you can now start planting your seeds. The seeds should be planted at least an inch deep, and they should be at least 4 inches apart. If you are planting multiple bean plants, you can do them in a row, and make sure that each row is at least separated by 3 feet.
  4. Support your plants – at about the same time after planting your seeds, you should also start making your plant supports. Keep in mind that beans grow in vines, and they need support where they can cling on. Doing it early is better, because you might end up damaging the roots of your sprouts when you choose to set-up your support at a later time.
  5. Prune – you might also want to cut the vines that are starting to crowd the place. Beans will also need an ample space in between plants, so that there will be proper air circulation between them.
  6. Watering – beans will also need nutrients from water. So make sure to water your beans at least once a week with 1 inch water. Do not overwater because doing this can be bad for them as well.
  7. Mulching – once your beans have already developed the second batch of leaves, you can nurture it with mulch or compost. Doing this will help you yield more during your harvest.
  8. Harvest time – the time of harvest will always depend on the type of beans that you have planted. Check the packet of your beans to know if it is already time to harvest them. But as a general rule, you might not like to harvest beans that have stayed too long on the vine. These beans are not best for eating anymore, but they will serve you well when producing new batches of plants for the next planting season.

image courtesy of Mason Masteka/flickr

How to Grow Basil

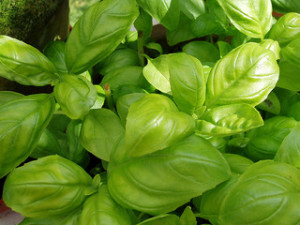
Basil loves the sunshine. In fact, it needs at least 6 hours of being exposed to the sun during the day, in order to produce healthy leaves and branches. Therefore, it is best to plant your basil during late springtime, when there is more sunshine and the soil is well drained and a bit moist.

With basil in the garden, you can easily turn an ordinary dish into a restaurant quality dish. It is a herb that gives a unique How to Grow Basilflavor, whether you want to use it fresh or dry.

To grow basil does not require a lot of skills and know-how. But following a few guidelines will surely help you achieve healthy basil plants that you can keep for a long time.

Choosing The Type Of Basil Plant

In case you do not know, there are lots of different kinds of basil that you can grow in your garden. Each of them provides different flavors, so you might want to choose the ones that will appeal your taste. For instance, if you want a citrusy type of basil, there is what they call the Lemon Basil. If you want something that can be used for cooking as well as for aromatherapy, you can plant Purple Basil or Cinnamon Basil, because these variants of basil has a very distinct aroma that comes from its flowers.

If you are planting multiple variants in your garden, then you might want to label them, so you know what you are picking for the dish that you are cooking, or perhaps make your visitors know that there are different types of basil that they can use and also grown in their own homes.

Preparing The Seeds

You have to prepare the seeds of your basil by planting them indoors in separate pots. Doing this indoors is safer, because the temperature can be managed easily. Allow the seeds to germinate by mixing perlite, peat, and vermiculite (equal parts). Damp it with a little water. The seeds of your basil goes on top of the mixture, and cover it with plastic. Place the pot indoors but make sure that sunlight touches it. Water it twice a day, to make sure that moisture is maintained.

In just a few weeks, you will already notice sprouts. Once they are a bit taller already, transfer them in a different soil bed. Plant them at least with 6 inches space in between sprouts.

 Nurturing

At this point, you should have a growing basil plant already. Make sure to give it enough sunlight and water. Never overwater your basil plant, watering it once a day is already good enough for it to grow healthy and steadily.

Remove the flowers that you see growing. This is because flowers can take a huge chunk on the nourishment of your plant, which can decrease the actual flavor of the leaves. So snip it and remove it when you start seeing them.

These are the different ways that you should do, when you want to grow basil at home.

image courtesy of amandabhslater/flickr

How to Grow Bamboo

Bamboos are nice ornamental plants. When fully grown, it can easily turn a plain and boring garden into something that is more interesting and stylish, with an oriental twist. But more than aesthetics, bamboo can also provide good shade to your garden. If you have plants that need enough shading because it cannot grow under direct sunlight, planting them beside the bamboo will help you give them natural shading without completely shutting the sunlight.

 Choosing The Type Of Bamboo

If you are planning to grow bamboo in your limited space yard, you might want to deal with a variety that clumps togetherHow to Grow Bamboo when fully grown, and not something that grows from one place to another, unless you want to crowd your lawn with bamboo. Two of the most ideal types of bamboo that is perfect for home lawns would be the Clumping type and the Running type.
You might also want to seek assistance when choosing your bamboo, because there are several types of bamboo that cannot grow in colder areas. If you live in areas where the climate is cold, then you need to get a variety that is not intended for tropical climates.

 Choosing The Spot Where You Will Be Planting Bamboo

Ideally, most bamboos need at least 8 hours of sun every day. So you have to take this in consideration when choosing the spot at home where you want to plant your bamboo.

 Preparing The Soil

The nice thing about bamboo is that they can work with any type of soil. However, if you want to get the best for the results, you might want to plant them in maryl or loam, with a mixture of compost and other soil nourishing agents that will give all of the nutrients that your bamboo plant needs.

Just in case you live in an area where there is strong winds, you might want to provide your bamboo with some sort of support. Bamboos grow very tall, and strong winds can knock them down, even when their roots are tightly holding the soil. Placing a fence around the bamboo cluster will not only hold them together on the ground, but also make sure that there won’t be unwanted growths.

Ideally, planting bamboo starting from small sprouts is ideal. You can buy bamboo seedlings online, from nurseries, or from a local farmer’s market. There is a high chance of success if you plant them starting from seedlings, rather than starting off from seeds. Early spring is also the best time for you to plant bamboo. This is because bamboo loves the warm weather. Planting them early on spring will allow them to develop healthy and strong roots that will keep them standing when the frost comes.

Water your bamboo regularly. Since they are always exposed to sun, the soil can also be prone to drying. Keep the soil moistened as often as you can, but not to the point of drowning the bamboo with water. This will not do good as well.

image courtesy of quinn.anya/flickr

How to Grow Asparagus

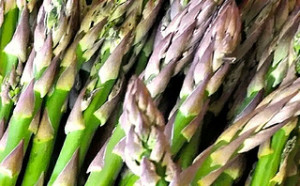
Ideally, asparagus are planted when the soil can be managed already. The best time for planting asparagus is any time during the spring. Early spring is better. The soil where you will plant asparagus should also have a good mix of compost, manure, and garden soil in order to provide proper nutrition and nourishment. These are just some of the basics that you need to know, if you want to grow asparagus.

To give you a more detailed guide on how to grow asparagus, please see the list below:

You know when spring is coming when you start seeing asparagus all over the market. But have you ever considered growing How to Grow Asparagussome for your own consumption? Actually, if you are conscious about your health, growing your own food provides better results, since you know what comes into your mouth. Of course, you would like to stay away from foods that are contaminated with chemicals, and choose foods that were organically grown, which translates into food that is safe to eat.

The first thing that you have to know about asparagus is that it is very choosy when it comes to climate. Asparagus grows better when you live in areas where the ground freezes during the winter time. But it can also grow equally good in areas where the land is super dry during the summer. Anywhere in between (ex. Wet summers, mild winters) will not be good for growing asparagus. So what I am saying is that you have to know whether or not your area can grow asparagus.

The second thing you need to understand when it comes to planting asparagus is that they take a lot of time growing! Let’s say you want to start from scratch (seeds), this will take you 3 years at the very least to start seeing the long strands. Now, if you want to shorten the growing period, then you can start with the crowns already, which is possible, because crowns can be purchase from farmer’s market, garden supply stores, or even online. Growing asparagus from crowns will only require 2 years, which is still lengthy, but at least you were able to cut a year of waiting.

 Harvesting Asparagus

After waiting for 2 to 3 years, you will be able to harvest asparagus already. However, it can be hard to tell how much harvest will you yield, as the procedure of growing asparagus can be a bit challenging, wherein transferring the asparagus into a different soil (which is needed when the asparagus have already developed roots), can still damage it and kill the spears.

Normally, you know when your asparagus is ready to be harvested when the tips are kind of loosened already. Another sign is its height. If the spears have already reached at least 6 inches, then this is the right time for you to cut it, and enjoy your long awaited harvest.

These are the different ways and tips that you might want to consider, if you want to know how to grow asparagus the right way.

image courtesy of one|27/flickr