Using Herbs & Vegetables in Cooking
Besides using herbs and vegetables in the kitchen, they are great on the grill. I've used cilantro and other herbs in marinades for pork, chicken, and steak. There are so many things you can do to make a great grilled meal. One of my favorite things to make on the grill is a good steak. I like to marinade the steak in some olive oil along with some fresh herbs like cilantro and oregano. I like my steak medium-rare, so I use the best instant read thermometer I can find so I have a quick accurate temperature reading.
Roasted veggies on the grill or in the oven are one of the best parts of having a garden. I'm a grilling guy so I always use them on the grill or even on the smoker. If you haven't yet used fresh herbs and veggies for grilling, you should really give it a try.
How to Grow Raspberries
The beginning of spring is the best time for you to plant and grow raspberries. Growing raspberries is actually a good way to have fresh and abundant stock of it that can be perfect for the holidays, and it is also a nice way to boost your health, since raspberries is packed with so many vitamins that will surely prevent illnesses and diseases that can limit your chance of having a happy life.
If you want to grow raspberries, here are the things that you have to do:
Choose The Area Where You Want To Plant It
It is always best to prepare the area where you want to plant your raspberries. This is because you want to make sure that your plants will have enough sunlight, water, and will be planted in a well draining soil. You must also protect your raspberries from birds or trolling raccoons. So you might want to cage your raspberries so you can get a good harvest of it.
Choose The Type Of Raspberry That You Want To Plant
In general, there are two common types of raspberries:
- Summer bearing – this is a type of raspberry plant that produces raspberries during the summer only. Once the season is up, it will stop bearing fruits and conserve its energy for the next fruit bearing season, which is next summer again.
- Ever bearing – this is a type of raspberry plant that can produce raspberries from spring to fall.
Buy Your Canes
Most garden supply stores or even online retailers have raspberry canes. These are the ones you plant, in order to grow your raspberry plant.
Planting Your Canes
Make sure that your soil is acidic. You can do this by adding compost or mulch. By the way, if you have used the soil for tomatoes previously, this might not be the best area where you want to plant your raspberry. This is because according to experienced farmers, raspberries and tomatoes suffer from the same disease, which can be easily transferred through a contaminated soil.
Plant your canes at least halfway down. Make sure that the soil is firm above, in order to hold the canes in place. You might also want to support your growing canes with trellises so that it will not grow unruly. Prune the branches, and remove the ones that are stagnant. These branches will not produce fruits, and will only use the plant’s energy for nothing.
If this is your first time to grow raspberries, it might be better to go with the purple or black ones. They are easier to grow. The red ones are more challenging to grow.
The nice thing about raspberries is that you can use them in a lot of ways. You can eat them raw, make shakes or juices out of them, or even make sauces that are delicious on top of cakes, ice cream and more! Raspberries can also be canned if you want to preserve it and give it as gifts this coming holiday season.
image courtesy of Ole Husby/flickr
How to Grow Pumpkins
The nice thing about growing pumpkins is that you can use almost every part of it. The flesh of the pumpkin can make mouth-watering soups for the cold weather, and the seeds can make healthy snacks, when you roast them. Growing pumpkins is actually ideal for people who are just starting to learn how to grow a vegetable garden. This is because growing them is very easy and fun. They also grow in most regions in the country, and their seeds are also inexpensive. You can even use the seeds from a pumpkin that you have bought from the grocery.
Here are a few simple steps for growing pumpkins in your own backyard:
Planning Your Planting
Pumpkins do not grow healthy during the cold weather, so this is the best time for you to start planting your seeds. Spring is actually a good time for you to plant your pumpkin seeds so that you will have a good harvest just in time for the Halloween carvings.
Preparing Your Soil
Since pumpkin plant crawl and they grow in vines, you have to make sure that there is an ample space in your garden for you to plant pumpkins. 20 to 30 yards of open space is good enough for one pumpkin patch. Make sure that this area also has enough sunlight during the day, because pumpkins love the warm temperature. You should also make sure that the soil is well draining. Ideally, pumpkins grow better when your soil is clay based.
Seeds
There are different types of pumpkins that you can plant at home. If you intend to use the pumpkins for the Halloween carving, then you might want to get seeds of larger pumpkins so that you can make nice decorative jack-o-lanterns for the holiday.
Planting
Your pumpkin seeds should be planted at least 2 inch deep in the soil. You should also make sure to give space in between seeds, so that their roots under the soil will have an ample space to grow. After planting the seeds, cover the soil with compost to give your soil enough nutrients, to ensure healthy and abundant pumpkins during the harvest.
Nurturing & Nourishing
Make sure that you water your pumpkins are watered regularly to keep the ground moist. Try to avoid the pumpkin leaves when watering, because the moist can often attract fungus, which can hurt your plant. This being said, it is best to water pumpkins early in the morning, so that it will have enough time during the day to dry out. Remember, fungus love moist and dark places. So fungus are likely to attack during the night time.
Harvest Time
It is easy to tell when the pumpkins are ready for harvesting. If you see them in full size already, and that they have turned into orange already, then this is already a clear sign that your pumpkins are ready for picking and carving to make nice jack-o-lanterns.
image courtesy of ginnerobot/flickr
How to Grow Potatoes in a Container
Potatoes are one of the most commonly purchased crops in the market today. Many of us use potatoes at least 3 times a week, making delicious hash browns for breakfast, mashed potatoes for lunch and dinner, and practically using them in so many ways in a lot of the dishes we know.
Potatoes grow in a wide variety of sizes. Larger varieties obviously require more space for them to grow into the right size. But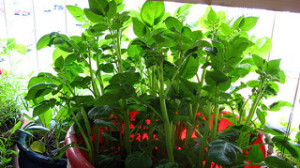
If you want to know how to grow potatoes in a container, follow the steps below and achieve great results on your harvest.
Step 1: Fingerling Potatoes
Since you have limited space, the best variety of potato that will best grow in a container is the fingerling variety. This type of potato does not normally grow more than 3 inches. Use seed potatoes that are small. If they are 3 inches or sometimes bigger, you might want to cut them into two to three pieces.
Step 2: Produce Sprouts
Get your seed potatoes and arrange them in a tray. Spray water to moisten them, and place them under the sun. Soon, they will produce sprouts. Once they do, get them, because at this point, they are now ready for planting.
Step 3: Prepare The Container
Make sure that your container has holes. This will allow excess water to drain. You do not want water to sit in your container, as this will rot your potatoes for sure. Once you already have the holes, place a wire mesh inside the container, then pour in your potting soil. The wire mesh will prevent the soil from spilling, which can happen, when you start watering the potatoes.
Step 4: Planting The Sprouts
Once your container is ready, place your potato sprouts inside, and plant them at least 2 inches deep. If you are planting your potatoes in a big container, you have to make sure that they are at least 4 inches away from the sides of your container, and that they are also 6 inches apart from each other. That way, they will be able to have enough room to grow for its roots. You should also place 2 inches of oil on top. Mixing compost and manure will enrich the soil too. Actually, you have to add soil (2 inches) every time your potato plant grows 6 inch taller. That being said, you will have to make sure that your container is deep enough to accommodate the additional soil that you have to place, as your potato grows.
Step 5: Harvest Time
When your potatoes grow flowers, this is already a good sign that they have fully matured already. Ideally, you need at least 2 months from the time you have planted the sprouts in order for you to do your harvest.
This is how to grow potatoes in a container that turn out wonderfully.
image courtesy of Hair Squared/flickr
Add the Right Nutrients to Your Garden
Buy only the nutrients your soil test specifies you need, and save the rest of your money for more plants.
How to Grow Peas
Some people think that peas only grow in areas where there is cold weather. Actually, this is not true! Peas can grow anywhere; as long as you follow the steps that we have for you below, you will be able to enjoy fresh, crisp, and plump peas all throughout the year.
Peas are great for almost any type of meal for the day. It can be a nice side dish for breakfast, garnishing for a delicious lunch and dinner, and so on.
If you want to know how to grow peas no matter where you live in the country, go ahead and follow the steps I have for you below, in order for you to achieve successful harvest.
Choose Your Planting Spot
Peas love the sun, so you have to make sure to choose for a spot where there is always sunlight. If you have an area facing the south, that would be the best spot to grow your peas.
Your soil should also be a bit acidic. Make sure to test your soil, and make sure that the PH level is at least 6 or 6.8. You can have your soil tested, and add nutrients into it in order to achieve the right PH.
Peas also love moist soil. So you have to make sure that the soil is well draining. Peas that are overly watered will die, so do not overdo your watering. You can also add compost to your soil, as your peas will love well cultivated soil. Do not add nitrogen anymore as peas will have enough nitrogen from the air.
Choose The Type Of Peas
Once your soil is prepared, you can now plant your peas. Peas come in different types, and choose the one that will serve the purpose after harvest.
When planting your peas, make sure to plant them one inch deep. If you are planting multiple seeds, make sure that they are at least 4 inches apart. That way, they will have more room to grow under the soil.
Guide Your Peas When Growing
Remember that peas grow in vines. So you have to install trellises around each plant, and you have to guide them during their first sprouting. Once they are long enough, your peas will know where to cling already.
Nurturing Your Peas
Water your peas every week with at least ½ inch of water. Nothing more than that. If you water your peas too much, there is a great chance for it to die.
Remove weeds growing around your peas, so that all of the nutrients of the soil will only be concentrated on your peas.
Harvest Time
Continue nurturing your peas until they have already developed flowers. Once you see flowers, you can already start counting the days for your first harvest. Normally, you only need at least 3 weeks for you to harvest peas from the time you have seen the first flower on your vine.
These are the different methods for growing great peas.
image courtesy of eraphernalia vintage/flickr
How to Grow Peanuts
Peanuts are one of the easiest things to grow in the garden. You can use peanuts in so many ways; steam them, roast them, sun dry them, or even cook delicious meals with them. You can even make your own peanut spreads if you want. Since peanuts have so many uses, many homeowners are fond of growing them in their own lawns.
If you are planning to grow peanuts as well, here are the things that you have to remember:
Get Your Peanuts
It is actually easy to grow peanuts because all it takes is a bag of fresh and raw peanuts that you can easily buy from the grocery store. If you are really that meticulous and you want to make sure that your peanuts were not treated with any kind of chemically formulated pesticides, you can always go to your trusted local farmer’s market.
Preparing The Soil
Make sure that your soil is made of sandy oil. It should also be well draining. You must have at least 7 inches of soil to make sure that your peanuts will have a lot of room under the ground to grow its roots. Plant the peanuts one by one, making sure that there is an ample space in between them, so they can grow freely.
You can also add mulch if you want. You can also mix your sandy oil soil with compost or manure in order to add nourishment to your peanut plant.
By the way, when planting peanuts, you have to plant whole kernels. If they split, they will not be able to grow and produce sprouts. Water your peanuts once. Wait for it until the first sprout shows on top of the soil. This should happen in just a week’s time.
Nurturing Your Peanuts
As a rule of thumb, always remove weeds from the ground. This is because you want to remove anything that can share the soil’s nutrition. Watering regularly is also needed, but make sure that you do not overdo it, otherwise, they will die. You should also make sure that your peanuts will have enough sunshine but not to the extent of letting them sit under the sun for too long, because overexposure under the sun can damage your peanut plants.
Harvesting Peanuts
Harvesting peanuts can happen after 130 days. After 130 days, you can already expect peanuts to be fully matured. You can slowly pull them off the ground, and let them dry. Make sure that you store your peanuts in a clean and dry place to preserve its freshness. If you are worried about their shelf life, you can always roast them and store them in an air tight container that can be perfect for weeks of healthy snacks, or you can also turn them into peanut spreads that is perfect for gift giving this coming holidays.
These are the different steps that you have to do, if you want to grow healthy and bountiful peanuts that will give you a bountiful harvest.
image courtesy of tamburix
How to Grow Orchids Indoors
Orchids are very well known exotic flowers. They normally grow in the wild, which makes them very difficult to grow commercially, and even more challenging to grow indoors, as they are accustomed to growing in an outdoor setting.
Nonetheless, growing orchids indoors is not an impossible thing to do, especially these days, when there are several things that
For instance, there are potting mediums that we can use for orchids, as well as hybrids that will make orchid growing easy, especially for beginners.
If you want to know how to grow orchids indoors, here are the steps that you need to follow:
Purchasing Orchid Seedlings
The best way to start growing orchids is through seedlings. You can buy orchid seedlings almost anywhere. But if you want the best assistance for this, it might be best to go directly to a nursery, so that the staff there will be able to assist you when you have questions. Get your seedlings from nurseries, but make sure that your seedlings will not show signs of health issues. Usually, orchids with disease have black patches that can be seen on its leaves. Ideally, you would like to get orchid seedlings with bright green leaves.
The Orchid Environment
Choosing your orchid environment can be quite challenging. This is because you want to mimic the same environment is has, when it was growing in the wild. But for orchids that you want to grow indoors, you might want to select the ones that are called “air plants”. These are the types of orchids that grows on trees, where they receive an ample amount of shading from the branches and leaves of the trees, when there is too much heat coming from the sun. Trees are also often packed with fungus and debris. These are actually nutrients for the air plants. So if you want to grow orchids indoors, try to emulate this type of environment for it to grow and produce beautiful exotic blooms.
Lighting is also needed by your orchids. You can either install a filtered light, or you can also place them in front of window that gets enough sunshine. However, since orchids do not want too much sunshine, you need to place a sheer curtain or covering to prevent them from getting too much heat.
You must also invest on a good air humidifier. Orchids love humidity, so this is very important if you want them to grow perfectly indoors.
Do not over water your orchids. It will just drown them and kill its roots. Just make sure to water them when you feel that the soil is already dry.
Adding fertilizer to your orchids will help your orchids grow healthy with a lot of vigor. Remember, making sure that your orchids are healthy will also give you the same level of assurance that your orchids will be able to produce healthy and vibrant flowers that you will surely be proud of.
image courtesy of infomastern
How to Grow Onions
Onions are very tasty and make so many dishes savory. It can be used in a wide variety of dishes from appetizers, soups, and of course in main courses. Growing your own onions is a nice idea, because not only do they grow easily, they also need very little space in your garden, which is good for people who want to start a small vegetable garden at home.
One more thing that you will like about onions is that they grow fast and it has a long shelf life. Meaning, you can harvest a large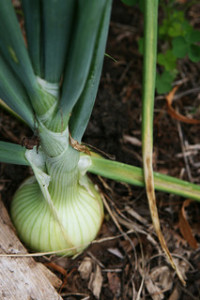
So if you want to grow onions, here are the ways to do it:
Choose Your Onions
Onions do come in different varieties that are often categorized by color (yellow, white, and red), and of course by growing type (long day & short day). Long day onions start to sprout early when the day is longer (about 14 to 16 hrs / day) and short day onions grow when the day is shorter (about 10 to 12 hrs / day).
Onion Seeds Or Bulbs?
You can plant onions by either planting seeds or bulbs. If you have no experience yet, professional vegetable gardeners prefer that you choose bulbs over seeds. This is because onion bulbs are easier to grow since they have the ability to withstand most distractions during the growing season. But if you prefer growing your onions from seeds, you may still do so.
Plant Them Indoors First
Unless you live in an area that constant has below 20 degrees F in temperature, you must plant your onions indoors, so that you can manage the temperature easily. The best time of the year for you to plant onions is during the spring time when the frost is out, and the sun is up. Onions can die during the cold weather, that is why.
Taking Them Out
When your onions are ready to be planted outside, make sure to plant them in an area where there is direct sunlight. Onions love the sun, and this will make them grow healthier and more flavor. Furthermore, you must give them enough space to grow. If you want bigger onions, you have to plant them far apart.
Nurturing The Onions
Make sure that the soil is properly nourished and free from any weeds. However, always remember that onions have very fragile roots. So be extra careful when weeding your patch, to make sure that you are not damaging the roots of your onions.
Harvest Onions
You should know when the onions are already ready for the harvest when the top is already golden in color. Pull the onion by grabbing the sprout, and gently lift it with one hand.
Onions have a good shelf life, so all you need is dry them, clean them, and place them in a dry place to keep them fresh.
image courtesy of quinn.anya/flickr
How to Grow Mushrooms
Mushrooms are delicious, nutritious, and make a wonderful dish all the time. Growing mushrooms is actually very easy. In fact, growing your own mushrooms will also give you the peace of mind of eating it with pleasure, minus the worry that you might be eating something that can make you sick.
Furthermore, weight watchers and the health conscious people should really learn how to grow their own mushrooms. Because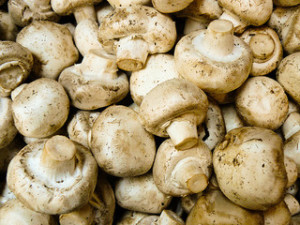
Mushrooms love the indoors. This is another advantage if you hate going under the sun to grow your own food. So if you have a closed yet well ventilated and easy to manage space at home, you can use it to grow mushrooms.
Here are some tips to remember when growing mushrooms:
Choosing The Type Of Mushroom To Grow
There are several mushrooms that are popular in dishes these days. They are the shitake mushrooms, the button once, and the oyster mushrooms. They are all very easy to grow, but you have to give them the right place where they can grow conveniently. Ideally, all can grow on straw or even in sawdust. But to give them the proper environment where they can get proper nourishment, make sure to follow the list below:
Oyster mushrooms = straw
Shitake mushrooms = sawdust
Button mushrooms = manure with compost
So these are the proper, or shall I say ideal growing places for mushrooms that you might want to consider, depending on the type of mushroom that you want to grow.
Spawns
Now that you have a growing media for your mushrooms already, you should now buy your spawns. Spawns are more ideal compared to spores. This is especially true, if you do not have experience in growing mushrooms yet. You can buy spawns online, in a local farmer’s market, or even at a gardening supply store.
Preparing The Growing Media
Before placing your spawns on your growing media, you have to sterilize it first, in order to kill any microorganism that might interfere or contaminate your spawns. You can do this by heating the media inside a microwave oven for at least two minutes. You might want to damp the media with a little water too.
Heat Will Promote Growth
You might want to heat a pan up to at least 21 degrees C. Place the growing media on top of that, and spread the spawns on the growing media. Leave the pan with the spawns and growing media on top, and place in a room that is dark. This kind of environment is ideal for mushrooms to grow quickly and abundantly. This process will take 3 weeks. After that, you will have to transfer it in a room where the temperature is colder (at least 13 degrees C).
Harvest Time
Wait about 3 weeks again, and after that, you will already see mushrooms sprouting.
image courtesy of Dawn Endico/flickr
How to Grow Hops
Hops are great to plant at home especially if you are looking forward to brewing your own homemade beer. In case you do not know, some beers are made of hops. You can also make different types of beers from the different variants of hops that you plant. But aside from making beer, people also grow hops because they make nice decorative pieces that hangs over trellises.
Hops normally grow during late spring or up to early summer. Since we are already in our mid-summer, you can still check out 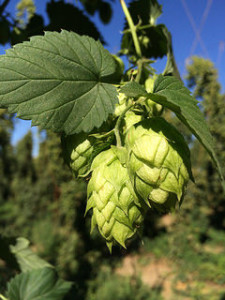
Here are the different steps on how to grow hops:
- Preparing the place – since hops are plants that climb, you might want to provide trellises or anything where they can climb on. You should also find the perfect place to plant them where there is equal sun and shade. Then of course, your soil should be well-nourished, and should be well draining.
- Planting the rhizomes – hops starts out from rhizomes. They are small root like stems. You can buy rhizomes from farmer’s market or from vegetable garden supply stores, or you can also check independent growers online. Dig holes up to 8 inches deep. Place the rhizomes inside the hole, and cover it with lose soil. Make sure to plant the roots first, and the sprouts point upwards. Make sure that you still have at least an inch of soil at the top.
- Watering Hops – hops love water. But make sure that the soil is well draining, because if not, it will hold up the water, and the hops will die. Water them daily with just enough water that will ensure moisture. After 2 to 4 weeks, you should see sprouts already.
- Pruning Hops– the hops will grow in length, but ideally, you might just want to grow 3 to 4 strands of it, and the others, you will need to prune. Choose the best strands to grow. Pruning other strands will help the best strands to grow better, since all of the plant’s energy will be conserved to them.
- Harvest Hops – You should harvest hops when they are already ripe. you should know when the hops are ready, when they feel a bit oily and sticky to the touch. They should also show green all over, and they should be a bit lighter, compared to the hops that are not yet ripe.
Once you are done with your first harvest, you have to place your hops inside a tight and sealed container. This will prevent the hops to rot. Expect your next harvest in the next day; do not leave your hops in the vine because it can ripen quickly. That’s if you are not planning to use them for brewing beer, and use them for decorations in your garden.
These are the different steps on how to grow hops at home.
image courtesy of epicbeer/flickr
How to Grow Herbs Indoors
Wintertime is fast approaching, which also signifies the time when planting outdoors is not a good idea anymore. If you want to still continue your planting hobby this winter season, and would like to find satisfaction from seeing your plants grow, then start checking out some of the herbs that you want to grow.
Herbs are quite manageable even during the winter season. They are not very hard to handle, and they require very little 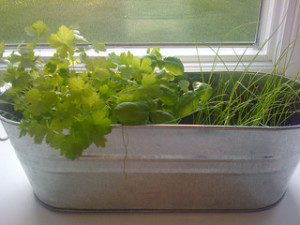
To help you plant and grow herbs indoors, here are the things that you have to do and remember:
- Choose Your Herbs – It is always best to go with multiple herbs, as you can use herbs to spruce up the flavor of every dish. You can choose to grow chives, mint, parsley, bay, and so much more! However, you might want to stay away from dill, because this particular herb cannot really grow during the cold weather, regardless of what you do. The nice thing about herbs is that they can be planted in the same pot. So if you have limited space in your kitchen where you intend to place your pots, nor worries! Two to three variants of herbs can share one pot.
- Choose Your Pot – Ideally, you would like to use clay pots for herbs, because clay pots can allow moisture in and out. But if you can’t find clay pots, you can always use any type of pot made of plastic or metal. Just make sure to find the ones with holes that will allow easy draining. Just make sure to cover the holes with wire mesh so that the soil will not drain with the water.
- Artificial Lighting – if you have a window in your kitchen where there is at least 6 to 8 hours of sunlight, place your pots in that place. If you have none, then you can always use artificial lighting. You can use a full spectrum light for maximum results. This type of light is available in most garden supply stores.
- Temperature – make sure that your herbs receive the right temperature. Please see details below:
- Daytime – 70 degrees F
- Nighttime – 55 degrees F
- Nurturing – make sure that your herbs receive the right amount of water. Ideally, you want to achieve a damp soil, not wet. So watering every 2 days should be good. Remove yellowing leaves too. Leaves that are turning yellow, and still attached to the main trunk will just waste the plant’s energy. You can also add fertilizers if you wish. But if you want to grow organic herbs, you can omit that part.
These are the different steps to take if you want to grow herbs indoors.
image courtesy of larryjh1234/flickr
How to Grow Lettuce
Do you enjoy eating a bowl of fresh greens every day? If so, then growing your own lettuce might appeal you. Keep in mind that although lettuce (of different kinds) are always available in stores, they do not have a long shelf life, even if you place them inside the refrigerator.
So to make sure that you will always have fresh and crisp lettuce in every garden salad that you make, go ahead and learn the 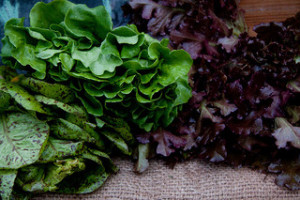
Here is how to grow lettuce at home:
Lettuce Seedlings
If this is your first time to plant lettuce, it is always recommended that you start with lettuce seedlings. It is easier to grow lettuce when roots have been established already. You can buy lettuce seedlings from a local farmer’s market or you can also check who are selling them online. There are many independent lettuce growers around, so you will not have a hard time finding them.
Choose The Planting Area Wisely
Lettuce like it best when the weather is cool and when there is sunshine as well. So it is best to plant them where the sun touches the area. The soil should also have at least a PH of 6. You can work on your soil’s PH easily by just adding mulch or agents that you can buy from garden supply stores. You might also want to plow the soil so that they will be crumbly and you must remove the stones and weeds alongside it. Mix in compost and manure to your soil before planting your lettuce seedlings.
Planting The Lettuce
When planting your lettuce seedlings, make sure that there is at least 8 inches open space in between plants. This will promote proper growth for your plants, because air will circulate better, and the roots under will have enough room to grow.
Nurturing The Lettuce
It is always best to water your lettuce just enough to moisten the soil. However, when watering lettuce, it is best done in the morning, so that the leaves will have enough time to dry. This will prevent bacteria or fungus to build up at night.
Harvesting Lettuce
Harvesting lettuce is easy. All you need to do is cut the leaves when you see that they are already fully grown. If you see that there are some leaves that are just sprouting, avoid cutting them. This will still grow and produce another batch of good harvest.
The nice thing about lettuce is that you can use them in a lot of ways. Aside from making a nice bowl of garden salad that is good for your body and health, you can also use it to make side dishes like coleslaws and use it to make delicious sandwiches that makes a healthy lunch.
These are the different ways to grow your own garden of fresh lettuce at home.
image courtesy of timsackton/flickr
How to Grow Herbs
Growing herbs is both easy and fun. In fact, you can grow multiple varieties of herbs that you can easily reach from your kitchen’s window, to spruce up the flavors of your dishes. Many of us use different types of herbs from thyme, rosemary, dill, parsley, and more. All of these are very easy to grow, and you can grow them in pots too!
The nice thing about herbs is that you do not have to get several different pots of each type of herb. Most herbs can grow 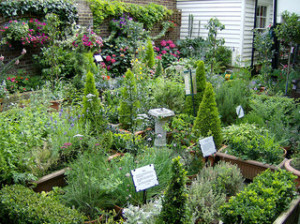
Here are the steps you should follow if you would like to grow herbs at home:
The first thing that you have to do is get the herb seedlings. That’s if you do not want to grow them starting from seeds. It is actually easier to grow herbs from seedlings because they have already established roots. So all you have to do now is make sure they live long, add nourishment for vigor, and water them to make sure that you will have constant supply of fresh herbs.
Herbs grow better in terra cotta containers. You can get this type of containers from garden supply stores or from online retailers. But if you can’t find one, plastic containers will do too! Just make sure that they have holes to drain excess water.
Before placing soil inside your container, you might want to put pieces of broken pots at the bottom. This will hold your soil intact, and prevent them from spilling out, when you start watering.
Pour garden soil inside the container. Arrange your herbs in a manner that you like. Ideally, taller herbs should be arranged at the back or in the middle. Shorter herbs should go in front or around the tall herbs. If you feel that the seedlings need more soil, do so!
Make sure that the soil is always moist. It might be best to spray them occasionally, or when you think that the soil is starting to dry out already. You can add organic fertilizers once each month if you wish. But if you can’t find organic fertilizers, and you do not want to use chemical fertilizers, you can skip this part. Most herbs grow easily without too much maintenance. So you do not have to worry at all; so long as you are watering it and keeping the soil moist, your herbs are sure to grow healthy and will have a lengthy life.
Snip herbs when you need to use it for cooking. Just make sure to snip healthy ones, and remove the ones that have dried out already.
These are the different methods you should incorporate, if you want to grow herbs at home. They are fun to have because they not only add great taste to every dish, they can also make a beautiful accent piece in your kitchen that provides a nice aroma as well.
image courtesy of Cathedral City Guide/flickr
How to Grow Grapes in Your Backyard
The process of growing grapes requires time and lots of patience. So if you are really determined to grow your own grapes at home, then you might want to put your focus and full attention into it, so that you will be able to reap a good harvest for you and your family to enjoy.
Ideally, grapes can be grown starting from a graft or cut-outs from existing grape vines. However, this might not be possible at times, because you might not have a good source of it. Grape seeds are always available; it is harder to grow, but the being able to grow them will surely give you a lot of reasons to be proud of yourself.
So here are the steps to grow grapes:
Choosing Your Grapes
In case you do not know, there are thousands of different varieties of grapes. Some are good for eating, some are great for making jam, while some are just good for decorative pieces in your garden. That being said, you should choose the type of grape variety that will meet your demands after harvest. Climate is also another factor that you have to consider if you want to grow grapes. Choose the type of grapes that will grow on the kind of climate that you have.
Once you were able to determine the type of grapes that you want, buy them from garden supply stores or online retailers of seeds.
Preparing The Seeds
Once you are able to get the seeds, make sure that the seeds you will be planting are of the best and healthiest. Discard the ones that are not. Place them in water. Everything that sinks under are healthy. The one the floats, are not. Remove them.
Soak the seeds for at least 24 hours in distilled water. After soaking, prepare a medium where they can start to germinate. Moistened paper towels will do. Since grapes love the cold climate, you might want to keep them inside the refrigerator during the initial germination process.
After refrigerating, you will now have to plant the seeds. One for each small pot. While in the pot, you have to maintain at least 70 degrees F. If you are not quite sure about managing temperature manually, you can use greenhouse warming mats.
Watering grapes should include misting or spraying only. Never pour water, or your grape seeds will not grow. Grape sprouts should start to show in about 2 to 8 weeks after planting them in pots.
When your sprouts have reached at least 3 inches, it is now time to transfer them in the ground, to allow them to grow further. Make sure that your grapes will have something to cling on, since their vines will start crawling. You can make trellises around each plant. By the way, when planting your grapes outside, you have to make sure that your soil is well draining.
Harvest time is easy to tell. This is when your grapes are already fully grown in size, and the color has already changed.
Image courtesy of Otto Phokus/flickr
How to Grow Ginger in Colder Climates
Ginger is what they say a tropical crop. It grows in warmer areas only, including the beautiful Hawaii in the US. You need at least 8 – 10 months of warm weather if you want to grow ginger. This is the reason why majority of the places in the US cannot grow ginger in normal lands. But just in case you want to try to grow ginger at home, here are the things that you have to do: make sure that you have an indoor space where you can plant ginger, and the temperature can be closely controlled to keep the ginger warm.
Hydroponics is the only possible way for you to plant ginger in colder areas. In this process, baby (immature ginger) is planted 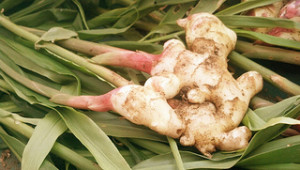
Hydroponics is a method used by commercial growers to ensure a good amount of harvest that will meet the demand of the market. But if you want to grow ginger in your own home, you can also try a simpler method. However, since ginger is quite sensitive to the cold weather, you might want to do a little research on how to properly manage the temperature on where you want to grow your ginger. Furthermore, you have to manage your expectations, as the success of ginger growth might not happen quickly or possibly. Nonetheless, there is no harm in trying.
Successfully growing ginger is one of the most rewarding things you can ever experience. Despite the fact that you know it is hard to grow in colder weathers, you can also use ginger in so many ways; you can make delicious stir fried dishes with it, and you can also create hot drinks from it, that are not just tasty, but good for your health as well.
Some people find success growing ginger by getting an untreated and healthy ginger root from the grocery or from a farmer’s market. Then, you have to soak it in water, and plant it in a 12 inch deep hole. The soil should be loosen, so that you will give an ample amount of space for the roots to grow. Make sure that your pot is placed where there is direct sunlight. This will ensure warm temperature. Water your ginger regularly as well. Be patient because ginger will take at least 10 to 12 months before it starts to reach maturity. You can also use organic fertilizers to give your potted soil some nourishment.
This is a basic way to grow ginger at home. With proper care and nourishment, you can expect ginger by the end of the year.
Image courtesy of andresmh/flickr
How to Grow Ghost Peppers
Do you love spicy dishes? If so, then you might be interested in growing ghost peppers. In case you do not know yet, ghost peppers are the spiciest peppers in the world. It was first discovered in India, and it is said to be hotter than jalapeños or even habenaros.
Anyway, you do not need to live in India if you like to source ghost peppers. In fact, you can start growing them in your home, 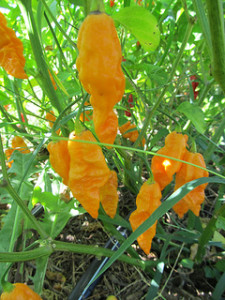
Here are the different steps that you can do, if you want to grow ghost peppers at home:
The first thing that you have to know is that it takes quite some time before you can do your harvest. Therefore, you have to make sure that you have the perfect environment for it to grow healthy, and the patience too, so you will continue feeling motivated to see what your harvest will look like.
To germinate the seeds of the ghost peppers, you will need at least 35 days. Then from germination, you will need another 150 days, before the plant produces fruit.
So the first thing that you have to do is to plant your seeds. Make sure that your soil is nourished enough, and should be well draining as well. Water cannot sit inside your container, otherwise, your seeds will not produce sprouts.
Ghost peppers also like warm soil. Therefore, you have to make sure that your soil is at least 90 degrees F. You can do this by placing your garden bed on top of a heating plate.
When your sprouts are starting to show from the seeds, you might want to help it germinate more, by placing a CFL lighting. Continue moistening the soil. Moisten only, just so it will not dry. Do not overwater.
When your sprouts are at least a week old, you can start exposing them under the sun. That way, the sprouts will already be accustomed to the new environment, in preparation for their transplantation.
Start transplanting your ghost peppers in the ground when they are at least 6 inches tall. Make sure to plant them deep enough so that the roots will continue growing. Make sure that each plant is at least 24 inches away from each other. They need that amount of space to grow their roots, for proper air circulation, and for them to grow freely.
Water your newly transplanted ghost peppers. Wait for it to grow fruits, and wait for the actual fruits to change its color, before you go ahead and harvest it.
By the way, if you want to boost pollination in your chili garden, it might help if you plant different varieties of hot peppers beside your ghost peppers. A good choice would be habenaros and bhut.
These are the different steps, if you want to grow ghost peppers.
Image courtesy of Greenhouse17/flickr
How to Grow Eggplant
If you are new to vegetable growing, then growing eggplants might be the best that you can start with. Eggplants are really nice to look at both in the garden and on the table. It comes in a wide scale of variety, which is why you can see eggplants in different shapes, sizes, and colors.
Eggplants are also very easy to grow. This is probably one of the reasons why newbies in vegetable growing might want to start
Here are some of the tips that you might want to consider, if you want to plant eggplants:
Choosing The Area
Make sure that the area you are choosing for planting your eggplants will have long hours of sunshine. Eggplants love the warm weather, that is why. The soil should also be well draining, so that water will not sit at the bottom and damage the roots. The PH level of the soil should also be at least 5.8, and adding lime to the soil might also be best, because eggplants grow better in soil that is high in calcium.
Seeds Or Seedlings
The nice thing about eggplants is that you can start by either planting them starting from seedlings, which you can buy in most garden supply stores or nurseries, or you can also buy seeds from the same sources, or you can find them too from the garden section in your favorite grocery stores.
If you plan to start from scratch, you have to start planting your seeds indoors first. That way, you can manage the temperature easier, to make sure that your seeds will germinate well, and produce healthy sprouts fast.
Planting & Transferring
When your seeds have already sprouted, and the plant is about 1 to 2 inches tall already, you can now transfer it to your garden, where it will continue growing. However, if you live in cold areas, you have to make sure that the ground is already warm (preferably 60 degrees Fahrenheit), and frost is already out. Eggplants have a slim chance of survival in the cold, so this is something you want to consider closely.
If you bought seedlings instead of seeds, you also have to transfer it to the ground, at the same recommended time.
Make sure that the eggplants are 18 inches apart, so that their roots will have room to grow under. This will also give the actual branches of the plant to grow fuller, because eggplants tend to grow big and bushy.
Nurturing
Eggplants should be watered every week with at least an inch of water. That way, your eggplants will have enough nourishment from the moist soil.
Harvesting
You should know when the eggplants are ready for harvesting when they have already achieved a uniform color, and when they have grown to the right size already.
These are the different ways that you should try, if you want to grow eggplants.
Image courtesy of garlandcannon/flickr
How to Grow Cucumbers
Cucumbers are great to have inside the fridge, especially during this hot season. They are very refreshing and flavorful, which you can use for garden salads, soups, side dishes, and so much more! In fact, you can also use cucumbers to aid tired and puffy eyes.
The thing with cucumber that you buy from stores is that some do not have that sweet and very refreshing taste. Instead, they 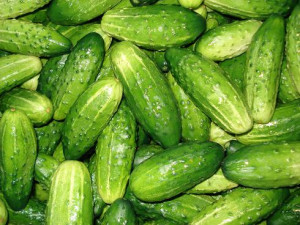
If you want to know how to properly grow cucumbers in your own garden, here are the steps that you have to do:
Cucumbers Love Water
The key to produce refreshing and flavorful cucumbers is to keep them hydrated. You have to water them regularly, to ensure that the soil is always moist. The amount of water needed will depend on the kind of soil that you have, and the weather as well. Remember, stressed cucumber plants often produce bitter cucumbers. Stress is often a result of plant dehydration.
Mulching
Mulching will also help your cucumber plant to grow healthy and produce fresh tasting cucumbers. Mulching can also prevent weeds to grow near the cucumber plants, which is great, because your plants will not share the nutrients coming from the soil. Mulching is often best to be done when it is already summer, or when the soil is completely warmed up.
Temperature
The thing with cucumbers is that they can be quite tricky to grow. They do love the heat of the sun, so they are best grown during the summer. However, cucumbers can also be very sensitive to heat. When the temperature is not managed properly, they will not produce good quality fruits, and they will not produce an ideal amount of harvest. Shading your cucumber plant is a good idea to control the temperature. You can either provide an artificial shade to control the amount of heat coming from the sun, or to plant higher plants beside it, to provide natural shade. Remove weeds that will share the nutrients of the soil too!
Harvest Cucumbers
When your cucumbers are starting to form, and you see that they are green all over, that is a good sign that they are ready for harvesting already. If you leave them for a long time in the vine, you will end up having hard and stiff cucumbers that is not ideal for eating anymore. Ideally, when you start harvesting the first batch, expect to harvest the next batches every 2 days.
Once the cucumbers are harvested, it would be best to keep them inside separate plastic bags so that it will keep its moisture inside.
These are the different ways that you can do, in order to grow fresh, sweet, and flavorful cucumbers that will freshen you up during a hot summer day.
image courtesy of Dorocia/flickr
How to Grow Corn
There are so many benefits that one can get from growing their own vegetables at home. It is great to be able to serve your family garden fresh fruits and vegetable. They are healthy, nutritious and taste great. In this article I’m going to show you how to grow corn.
Corn is one of the staple foods that we eat. We can have them in almost any time of the day, and corn is a great source of many 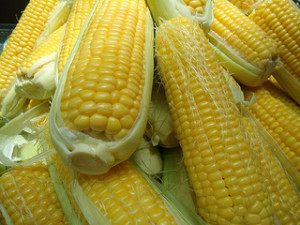
Corn can be grown at home with very minimal knowledge and skills. Below are the different ways that you can do, if you want to grow corn at home:
Choosing Your Corn
Know the type of variety of corn that you want to plant. This is because you have to know beforehand if the corn can live in the kind of climate that you have, as well as the PH level of your soil. Good thing that you can do several things to control the temperature where your corn is planted, you can also change the level of the soil’s PH, by just adding agents on the soil.
Most people intend to plant sweet corn, as this type of corn has the most use in most households. You can eat them on the cob, or you can also process them by canning them, to lengthen its shelf life. If you are planning to plant sweet corn, then you might want to check the different varieties of sweet corn that is determined by the level of sweetness that they have. You should check the following signs on the packet:
SU – semi sweet
SE – sugar enhanced
SH2 – super sweet corn
Planting Your Corn
Ideally, the best time to plant corn is when the soil is warm. If the soil is cool or cold, you will end up having rotten seeds. You should also choose an area where the corn will receive full sunlight for quite a number of hours during the day. You might also want to remove the weeds in that area regularly, as corns will have a difficult time growing when they share the nutrients of the soil with the weeds.
Experienced farmers know to plan their crops. Normally, they plant corn after the harvested peas or beans. This is because peas and beans leave a good amount of nitrogen in the soil, which corn plants love. But this does not mean that you have to plant beans before corn. What I am just saying is that you might want to enrich your soil with nitrogen, in order to give the needed nutrients of your corn plant.
Harvesting Corn
When your corn is about 12 inches at the very least, this already means that it is ready for harvesting. Another indication if the corn is already ready for harvesting is if has already developed silky strands of brown hair. Twist the corn and pull them when harvesting.
image courtesy of Meg Stewart/flickr
Tips for Washing Produce
Fruits and vegetables are an important part of a healthy diet. So, how do we go about keeping our fresh produce safe to eat?
Here are some simple tips for washing produce:
- Use a clean pair of scissors or knife to open your bags of produce
- Fruit and vegetable peels may carry bacteria that can spread during peeling, cutting, or eating. Wash all your fresh fruits and vegetables with cold tap water immediately before eating. This applies to all fruits and vegetables like bananas and oranges; even your pre-washed fruits and vegetables.
- Scrub your firm fruits and vegetables with a produce brush or produce rag to clean them.
- Remove and discard the outer leaves on lettuce.
- After washing place your produce into a clean container, not back into the original bag.
These are just a few tips for washing produce that will keep all your fruits and veggies safe to eat.
image courtesy of muammerokumus/flickr
How to Grow Cilantro
If you are fond of Mexican or even Asian dishes, then you might want to know how to grow a garden full of cilantro, so you can be sure to have fresh and crisp cilantro every time you need it. Cilantro are not just very flavorful. It is also packed with so much vitamins and minerals that is good for your body and health.
The thing with cilantro is that they can rot easily even if you store them inside the refrigerator. Therefore, having them planted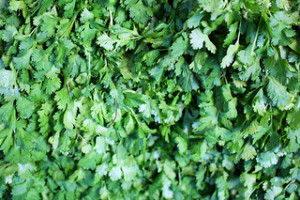
Here are the steps for growing cilantro:
Get The Seeds
You need good quality seeds if you want to grow healthy and abundant cilantro. You can purchase seeds online, farmer’s market, or from garden supply stores. When you already have them, wash them with soap and water. Make sure that you thoroughly rinsed the seeds. Once they are dry, you can now plant them. Make sure that the soil is well draining, and you have to place the pot anywhere where there is full sunlight.
Planting The Seeds
Cilantro can grow tall, so you might want to set at least 1 inch in between seeds. Make sure that the seeds are planted not more than 1 inch deep. This depth is enough for cilantro to develop strong roots. Cilantro cannot live in the frost. So if you live in cold areas, you might want to plant them indoors, but make sure that sunlight reaches your plant box.
Trimming & Pruning Your Cilantro Plant
Trim the leaves when they are already branching out far from the central stalk. This is because you want to conserve the energy of the plant, so that it will continue developing leaves. Cutting the leaves and flowers of the cilantro plant will also give you a good harvest of seeds that you can replant, in order to make new sprouts of cilantro. Pruning your cilantro plant will help you lengthen the time you have for harvesting fresh and crisp cilantro leaves.
Harvesting
When harvesting cilantro, make sure to cut leaves from different spots. This is to make sure that no parts will be dull, so that every part of your cilantro plant will continuously develop new leaves that you will use for cooking.
These are the different steps that you can do if you want to know how to grow cilantro. The steps above are actually basic. You can still learn more on how to maximize your harvest by gathering seeds from dead flowers, so you can make your cilantro garden bigger and bountiful. It is important to know how to harvest seeds from your existing cilantro plant. This is because no matter how you take care of your cilantro plant, this short lived plant will eventually die.
image courtesy of LeafLanguages/flickr
How to Grow Carrots in Pots
Carrots are very versatile. This is because you can enjoy them cooked or even raw. Carrots can make delicious cooked dishes. It can also be a nice snack that you can munch on, which is actually better than chips. Carrots are high in vitamins and minerals that will promote good health. So if you want to make sure that you will always have fresh and crisp carrots at home, here are the ways that you can do, in order to grow them at home.
The nice thing about carrots is that you do not always need to have a large lawn or garden to grow them. If you have deep pots 
Here are the ways on how to grow carrots at home in pots:
Choose Your Carrots
Since you are growing carrots in pots, it means that you might want to choose a variety that does not grow too much. Check this type of variety from a local nursery or from an online retailer of vegetable seeds.
Choosing Your Container
You can buy containers from garden supply stores that is deep enough to hold carrots, and has holes, so that it will drain the excess water. When you have already chosen your container, clean them and make sure it is free from any bacteria from dust or from a previous soil (in case you have already used this container already).
Preparing The Soil
Make sure that your soil is loose. This will help the roots grow as far as it can. You must also mix your garden soil wit compost or perlite to make sure that your soil will have enough nutrients to produce healthy carrots.
Pour the soil into your container, but leave at least an inch of empty space above. Create tiny holes, big enough to fit the seeds of the carrots. Make sure that the holes are at least 3 inches apart.
Nurturing
Water your carrots daily to ensure that the soil is moistened. Make sure that excess water will drain, because if the water sits inside the container, it will stop the carrots from growing, and possibly kill them as well. Once your carrots are starting to grow, there is a tendency for the top to be exposed. If this happens, make sure to cover it with more garden soil. Because if not, the top part will be stiff and become inedible.
Harvesting Carrots
Normally, you can harvest carrots two months after you have planted them. But this will still depend on the type of carrot that you planted. You might want to check on the packet for this. But as a general rule, if you want your carrots to be sweet to the bite, then you might want to harvest them at the earliest time possible.
These are the different ways that you can do, if you want to grow carrots at home, inside individual pots for your own consumption.
image courtesy of Betari Ratih
How to Grow Broccoli
Many are finding the right guide on how to grow broccoli, so that they can always benefit from a fresh and healthy harvest that will not only make delicious meals, but will also help them keep their health at tip top condition.
According to medical researchers, broccoli is high in vitamins and essential nutrients, including a cancer fighting agent called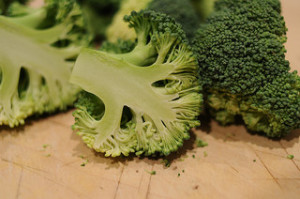
If you want to grow broccoli, here are the steps that you have to do:
- Plan where you want to plant your broccoli – broccoli grows as tall as 3 feet. Therefore, if you are fond of planting vegetables, and you plan to plant it near something else, make sure that the broccoli will not shade the nearby plants. The soil should also be well draining, and the area where you want to plant broccoli should have enough sunlight and shading.
- Soil PH – If you want to grow abundant and quality broccoli, you have to maintain the soil’s PH to at least 7. You can do this by adding compost or manure to your soil.
- Seeding – if you live in warmer areas, you have to plant the seeds at least early in spring. If you live in cooler areas, you have to do it at least two months before the last frost.
- Add more compost and manure – when your plant is starting to grow, at least half inch, add compost to the soil. Doing this will add more nutrients to the soil, which your broccoli plant will need for proper nutrition.
- Hydrating the plant – ideally, your broccoli plant will need 2 inches of water at the most every single week. The amount of water needed and the number of times you will need to water it will depend on the climate in your area.
- Mulching & Protecting the plant – to maintain proper soil moisture, mulch the area. Mulching will also prevent weeds to come near and share the nutrients of the soil. Place paper collars around each crown in order to protect the actual broccoli from insects and prey such as cutworms.
- Harvesting – the way to know if a broccoli is ready for harvest is to look at the size of it and the color. Ideally, the color should be green overall. Do not wait for it to turn yellow. If you think that it has reached the right size already (similar to what you see from the grocery stores), then this is the best time to harvest them already.
These are the different steps that you have to make, if you want to grow broccoli. This dark green vegetable is a member of the brassica crop. This particular group of vegetables is well known to fight a lot of illnesses and diseases, including a very life threatening disease called cancer.
How to Grow Blueberries
Blueberries are one of the best sources of vitamins and essential nutrients that your body needs, in order to keep our health in tiptop condition. It is also high in anti-oxidants, that makes us look younger for a long time, and prevents illnesses and diseases too. I can go ahead and enumerate the number of benefits of blueberries to the body, but just to cut it short, blueberries are good for the body, so eating it will always be best for you.
If you are planning on including blueberries into your diet, then you might want to know the ways on how to grow blueberries, 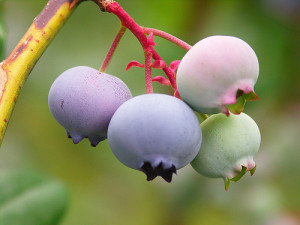
Here are the steps on how to grow blueberries:
Choosing Your Blueberries
Just like other fruits, blueberries come in different varieties. You have to choose the right variety that will suit your climate and the way you want to use it after harvest. For instance, there are blueberries that are best for eating raw and fresh because they are big and juicy. While some are best for toppings like blueberries on pancakes, waffles, or even on ice cream. These are the smaller ones.
Preparing To Plant
The preparations that you have to do initially will always depend on the type of blueberry that you want to plant. There are some types of blueberries that require a large space, for them to grow healthy, so it can produce a bountiful harvest. You might also want to make sure that the area where you want to plant your blueberry has enough sunlight. The soil should also be well draining, which means it can absorb water, but it should not let the water sit for a long time.
Also, blueberries are very particular when it comes to the PH of your soil. They prefer it to be more on the acidic side, so you might want to make sure that your soil has a PH of at least 4.09. If you go beyond 5 PH, this will not do good for your blueberry plants.
Promote Pollination
The flowers of a blueberry plant have male and female organs. However, you cannot be certain which among them can pollinate. To make sure that your blueberry plants will be able to pollinate, you must plant several varieties of it (still following the required space in between plants), so that the bees will be able to travel from one plant to another, and encourage pollination.
Pruning
When you are starting to grow bushes already, make sure to prune some branches. Doing this will eliminate branches that are stagnant, and allow the nutrients to go to the other healthy branches that will produce fruits.
Harvesting Blueberries
Harvesting blueberries can take some time. The actual waiting time will depend on so many factors including the type of blueberry that you planted, the climate, and of course the way you take care of your blueberry plants.
image courtesy of cagrimmett/flickr
How to Grow Blackberries Indoors
Fruit bearing trees are ideally planted outdoors in order to achieve success and better harvest. But this does not mean that you cannot plant them indoors, or in places where there is limited exposure to sun and outside weather.
With this, can you grow blackberries indoors? The answer is a big – YES! Blackberries are great source of vitamins, minerals, 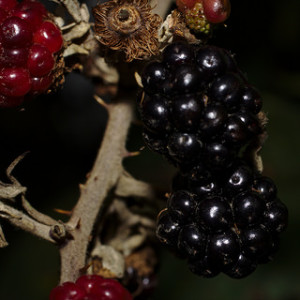
So if you have limited garden space, or if you live in an apartment, this should not deter you from growing blackberries indoors. You can, if you will try hard.
Follow the steps below in order to achieve good results from your blackberry indoor planting project:
Blackberries do come in different variants. But if you are growing them indoors where there is very limited space, you might want to get the erect dwarf type of blackberries. This type of blackberry have very strong roots and stiff trunk. This will hold up any pressure and condition in an indoor environment.
Any container will do when planting blackberries indoors. You can use the ones made of clay, metal, or even plastic. Just keep in mind that you are likely to move your tree once in a while indoors maybe to give it some fresh air or sunshine outside. Thinking of the weight of your tree, soil, and container, you have to make sure to add caster stand at the bottom of your container, so that you will be able to move it with ease.
Before putting soil into your container, make sure that the container has holes. That will help drain the water well. You might also want to place wire mesh in every hole that your container has, so that it will not spill the soil. You can also place pieces of broken bricks underneath so that it can control the water from being drained too much.
Once you are done preparing your container, you should now prepare your soil. You need soil that is specifically formulated trees bearing fruits. You should be able to find them in garden supply stores and greenhouses. But just in case you cannot find one around, you can also make it by mixing vermiculate, sand, and peat. All one part each.
Now that you have your container and soil ready, you can now transfer your blackberry seedlings. But before transferring, check the canes around to see if there are unwanted and unhealthy looking roots. Remove them, and plant your blackberry plant at least 5 inches deep.
While your tree is growing, you might also want to nourish your tree with some compost, bone meal, or mulch. These will help your tree get more nutrients to make sure it grows appropriately and as expected.
Harvest time happens on the second year (blackberries need 1 year to mature). It might take a while before you can taste the first harvest. But the long wait is definitely worth it, once you have seen your tree bearing fruits successfully.
image courtesy of stanzebla/flickr
How to Grow Beans
The nice thing about growing beans is that they are very easy to grow and very easy to manage. You can also plant different varieties of them all at the same time, as they all need the same level of nurturing and environment. Beans are normally classified into three different types; dry, shelled ones, and the snap beans.
If you have a vegetable garden, you might always want to include beans into the variety of your veggies, as beans are high in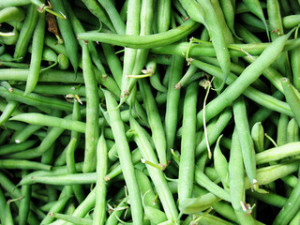
To start growing beans, here are the steps that you have to do:
- Choosing the area – it is important to choose your area wisely, because you have to make sure that the area where you will planting your beans will have at least 5.5 for the soil’s PH. Furthermore, the area should also receive a lot of sun, in order for the beans to grow healthier and with vigor.
- Enrich your soil – it is always recommended for you to mix your soil with potassium and phosphorus. You can omit nitrogen, because beans can source nitrogen from air.
- Planting the seeds – when the soil has already reached at least 55 Degrees F, you can now start planting your seeds. The seeds should be planted at least an inch deep, and they should be at least 4 inches apart. If you are planting multiple bean plants, you can do them in a row, and make sure that each row is at least separated by 3 feet.
- Support your plants – at about the same time after planting your seeds, you should also start making your plant supports. Keep in mind that beans grow in vines, and they need support where they can cling on. Doing it early is better, because you might end up damaging the roots of your sprouts when you choose to set-up your support at a later time.
- Prune – you might also want to cut the vines that are starting to crowd the place. Beans will also need an ample space in between plants, so that there will be proper air circulation between them.
- Watering – beans will also need nutrients from water. So make sure to water your beans at least once a week with 1 inch water. Do not overwater because doing this can be bad for them as well.
- Mulching – once your beans have already developed the second batch of leaves, you can nurture it with mulch or compost. Doing this will help you yield more during your harvest.
- Harvest time – the time of harvest will always depend on the type of beans that you have planted. Check the packet of your beans to know if it is already time to harvest them. But as a general rule, you might not like to harvest beans that have stayed too long on the vine. These beans are not best for eating anymore, but they will serve you well when producing new batches of plants for the next planting season.
image courtesy of Mason Masteka/flickr
How to Grow Basil
Basil loves the sunshine. In fact, it needs at least 6 hours of being exposed to the sun during the day, in order to produce healthy leaves and branches. Therefore, it is best to plant your basil during late springtime, when there is more sunshine and the soil is well drained and a bit moist.
With basil in the garden, you can easily turn an ordinary dish into a restaurant quality dish. It is a herb that gives a unique 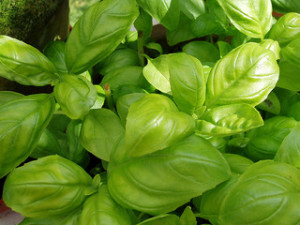
To grow basil does not require a lot of skills and know-how. But following a few guidelines will surely help you achieve healthy basil plants that you can keep for a long time.
Choosing The Type Of Basil Plant
In case you do not know, there are lots of different kinds of basil that you can grow in your garden. Each of them provides different flavors, so you might want to choose the ones that will appeal your taste. For instance, if you want a citrusy type of basil, there is what they call the Lemon Basil. If you want something that can be used for cooking as well as for aromatherapy, you can plant Purple Basil or Cinnamon Basil, because these variants of basil has a very distinct aroma that comes from its flowers.
If you are planting multiple variants in your garden, then you might want to label them, so you know what you are picking for the dish that you are cooking, or perhaps make your visitors know that there are different types of basil that they can use and also grown in their own homes.
Preparing The Seeds
You have to prepare the seeds of your basil by planting them indoors in separate pots. Doing this indoors is safer, because the temperature can be managed easily. Allow the seeds to germinate by mixing perlite, peat, and vermiculite (equal parts). Damp it with a little water. The seeds of your basil goes on top of the mixture, and cover it with plastic. Place the pot indoors but make sure that sunlight touches it. Water it twice a day, to make sure that moisture is maintained.
In just a few weeks, you will already notice sprouts. Once they are a bit taller already, transfer them in a different soil bed. Plant them at least with 6 inches space in between sprouts.
Nurturing
At this point, you should have a growing basil plant already. Make sure to give it enough sunlight and water. Never overwater your basil plant, watering it once a day is already good enough for it to grow healthy and steadily.
Remove the flowers that you see growing. This is because flowers can take a huge chunk on the nourishment of your plant, which can decrease the actual flavor of the leaves. So snip it and remove it when you start seeing them.
These are the different ways that you should do, when you want to grow basil at home.
image courtesy of amandabhslater/flickr
How to Grow Bamboo
Bamboos are nice ornamental plants. When fully grown, it can easily turn a plain and boring garden into something that is more interesting and stylish, with an oriental twist. But more than aesthetics, bamboo can also provide good shade to your garden. If you have plants that need enough shading because it cannot grow under direct sunlight, planting them beside the bamboo will help you give them natural shading without completely shutting the sunlight.
Choosing The Type Of Bamboo
If you are planning to grow bamboo in your limited space yard, you might want to deal with a variety that clumps together
You might also want to seek assistance when choosing your bamboo, because there are several types of bamboo that cannot grow in colder areas. If you live in areas where the climate is cold, then you need to get a variety that is not intended for tropical climates.
Choosing The Spot Where You Will Be Planting Bamboo
Ideally, most bamboos need at least 8 hours of sun every day. So you have to take this in consideration when choosing the spot at home where you want to plant your bamboo.
Preparing The Soil
The nice thing about bamboo is that they can work with any type of soil. However, if you want to get the best for the results, you might want to plant them in maryl or loam, with a mixture of compost and other soil nourishing agents that will give all of the nutrients that your bamboo plant needs.
Just in case you live in an area where there is strong winds, you might want to provide your bamboo with some sort of support. Bamboos grow very tall, and strong winds can knock them down, even when their roots are tightly holding the soil. Placing a fence around the bamboo cluster will not only hold them together on the ground, but also make sure that there won’t be unwanted growths.
Ideally, planting bamboo starting from small sprouts is ideal. You can buy bamboo seedlings online, from nurseries, or from a local farmer’s market. There is a high chance of success if you plant them starting from seedlings, rather than starting off from seeds. Early spring is also the best time for you to plant bamboo. This is because bamboo loves the warm weather. Planting them early on spring will allow them to develop healthy and strong roots that will keep them standing when the frost comes.
Water your bamboo regularly. Since they are always exposed to sun, the soil can also be prone to drying. Keep the soil moistened as often as you can, but not to the point of drowning the bamboo with water. This will not do good as well.
image courtesy of quinn.anya/flickr
How to Grow Asparagus
Ideally, asparagus are planted when the soil can be managed already. The best time for planting asparagus is any time during the spring. Early spring is better. The soil where you will plant asparagus should also have a good mix of compost, manure, and garden soil in order to provide proper nutrition and nourishment. These are just some of the basics that you need to know, if you want to grow asparagus.
To give you a more detailed guide on how to grow asparagus, please see the list below:
You know when spring is coming when you start seeing asparagus all over the market. But have you ever considered growing 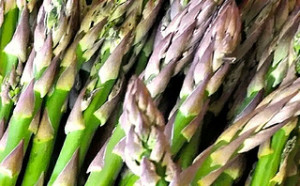
The first thing that you have to know about asparagus is that it is very choosy when it comes to climate. Asparagus grows better when you live in areas where the ground freezes during the winter time. But it can also grow equally good in areas where the land is super dry during the summer. Anywhere in between (ex. Wet summers, mild winters) will not be good for growing asparagus. So what I am saying is that you have to know whether or not your area can grow asparagus.
The second thing you need to understand when it comes to planting asparagus is that they take a lot of time growing! Let’s say you want to start from scratch (seeds), this will take you 3 years at the very least to start seeing the long strands. Now, if you want to shorten the growing period, then you can start with the crowns already, which is possible, because crowns can be purchase from farmer’s market, garden supply stores, or even online. Growing asparagus from crowns will only require 2 years, which is still lengthy, but at least you were able to cut a year of waiting.
Harvesting Asparagus
After waiting for 2 to 3 years, you will be able to harvest asparagus already. However, it can be hard to tell how much harvest will you yield, as the procedure of growing asparagus can be a bit challenging, wherein transferring the asparagus into a different soil (which is needed when the asparagus have already developed roots), can still damage it and kill the spears.
Normally, you know when your asparagus is ready to be harvested when the tips are kind of loosened already. Another sign is its height. If the spears have already reached at least 6 inches, then this is the right time for you to cut it, and enjoy your long awaited harvest.
These are the different ways and tips that you might want to consider, if you want to know how to grow asparagus the right way.
image courtesy of one|27/flickr

